

☕ AFFOGATO 🍨

For most of history, dessert wasn’t a fat bomb — it was a carbohydrate-forward, dairy-based ritual meant to end a meal with warmth, satisfaction, and calm. Italian classics like the affogato reflect this perfectly: sugar, milk, and coffee, with very little fat. Modern desserts flipped the script by combining high sugar with high fat, which is far more taxing on digestion, blood sugar regulation, and metabolic health. By returning to low-fat, milk-based desserts, we can enjoy sweetness in a way that actually supports metabolism, lowers stress hormones, and feels good both during and after the meal.
Affogato literally means “drowned” — vanilla ice cream drowned in hot espresso.
Simple, elegant, and deeply satisfying with almost no fat.
Ingredients (1 serving)
½–¾ cup low-fat or skim-milk vanilla ice cream (see recipes below)
1 shot hot espresso (or very strong brewed coffee)
Optional: extra sugar to taste, pinch of salt, splash of vanilla, drizzle of caramel sauce.
Instructions
Scoop vanilla ice cream into a small glass or bowl.
Brew espresso fresh.
Pour hot espresso directly over the ice cream.
Add sugar if desired (don’t be shy — this is dessert).
Eat immediately while hot + cold contrast is perfect.
Pro-Metabolic Notes
Sugar + dairy helps lower cortisol
Coffee improves glucose disposal
Low fat keeps digestion light and insulin effective
Use decaf espresso for an evening version
🍦 LOW-FAT VANILLA ICE CREAM (NINJA CREAMI)
Creamy, scoopable, and shockingly good with almost no fat.
Ingredients (1 pint)
1½ cups skim milk
½ cup nonfat Greek yogurt (or more skim milk)
⅓–½ cup sugar (to taste)
1 tsp vanilla extract
Pinch of salt
Optional: ½ tsp gelatin bloomed in 1 tbsp warm water (extra creaminess)
Instructions
Whisk all ingredients until fully dissolved.
Pour into Ninja Creami pint.
Freeze 12–24 hours.
Spin on Lite or Ice Cream setting.
Re-spin once if crumbly. Add a splash of skim milk if needed.
Texture Tips
Sugar is essential — don’t under-sweeten.
Gelatin improves body without fat.
This base works perfectly for affogatos, floats, and sundaes.
🍨 LOW-FAT VANILLA ICE CREAM (NO MACHINE)
This version is closer to a soft-serve / semifreddo style, but it’s creamy, satisfying, and very low-fat.
Option 1: Gelatin-Set & Frozen (Simplest)
Ingredients
2 cups skim milk
½–⅔ cup sugar (to taste)
1 tsp gelatin (or 1½ tsp for firmer texture)
1 tsp vanilla
Pinch of salt
Instructions
Bloom gelatin in 2 tbsp warm water and set aside.
Heat skim milk, sugar, and salt gently until hot but not boiling.
Remove from heat and whisk in bloomed gelatin until fully dissolved.
Stir in vanilla.
Chill completely in the refrigerator.
Pour into a shallow dish and freeze.
Stir every 30–45 minutes for 3–4 hours, or blend once frozen for a smoother texture.
Result: smooth, scoopable, low-fat ice cream texture.
Option 2: Blender Hack (Fastest)
Ingredients
2 cups frozen skim milk cubes (freeze in ice trays)
¼–½ cup sugar
1 tsp vanilla
Pinch of salt
Blend hard until creamy. Eat immediately like soft serve.

🦃 Traditional Turkey Gravy (with Quick Stovetop Organ Broth)

This is the way gravy was always made before boxed broths, seed oils, and flavor packets took over. You simmer the turkey organs with simple aromatics, build a deeply savory broth in under an hour, whisk it into your pan juices, and finish with just enough butter to make it silky.
It tastes rich, but doesn’t sit heavy — exactly how traditional gravy should be.
Ingredients
Quick Organ Broth
Neck + giblets from your seed-oil-free turkey
1 small carrot, chopped
1 celery stalk, chopped
1 small onion, quartered
1–2 garlic cloves, smashed (optional)
1 bay leaf
6 cups water
Salt + pepper to taste
Gravy Base
Turkey pan drippings (whatever amount you naturally have)
2–3 tbsp sourdough starter OR arrowroot powder if needed
2–3 cups organ broth (from above)
1–2 tbsp butter (just enough for that glossy, traditional finish)
Salt + pepper to taste
Optional: splash of white wine or lemon juice for brightness
Optional: minced fresh herbs (thyme, parsley, sage)
Instructions
1. Make the Organ Broth
Add the turkey neck, giblets, carrot, celery, onion, garlic, bay leaf, and water to a medium pot.
Bring to a boil, then reduce heat and simmer 45–60 minutes.
Skim any foam.
Strain and reserve the broth.
Chop the liver/heart finely if you want to blend them into the finished gravy for extra flavor (old-school style).
This broth is insanely flavorful and makes the gravy taste like it cooked all day.
2. Make the Gravy
After roasting your turkey, pour the pan drippings into a measuring cup.
Skim off excess fat if needed — leave a little for flavor.
Place the roasting pan on the stovetop over medium heat (or use a skillet).
Add the drippings back in and whisk in 2–3 tbsp flour to form a loose roux.
Cook 2–3 minutes until it smells toasty.
Slowly whisk in 2–3 cups of your organ broth, letting it thicken as it heats.
Simmer 5–10 minutes until silky.
Stir in 1–2 tbsp butter to finish.
Salt and pepper to taste.
Blend in chopped giblets or herbs if you love it rustic.
Notes
Arrowroot works if you want a gluten-free gravy, but add it at the end with a quick simmer (it gets weird if boiled too long).
If you like it extra glossy, whisk in an extra ½ tbsp butter at the end — that’s literally all traditional gravy needs to taste rich.
If it gets too thick, splash in more broth or water.
If it’s too thin, simmer a few minutes longer or whisk in a tiny slurry of flour + broth.
Optional Add-Ins
Squeeze of lemon for brightness
Splash of wine for depth
Fresh thyme or sage minced finely
A teaspoon of honey if you want a slightly sweeter, more old-fashioned flavor
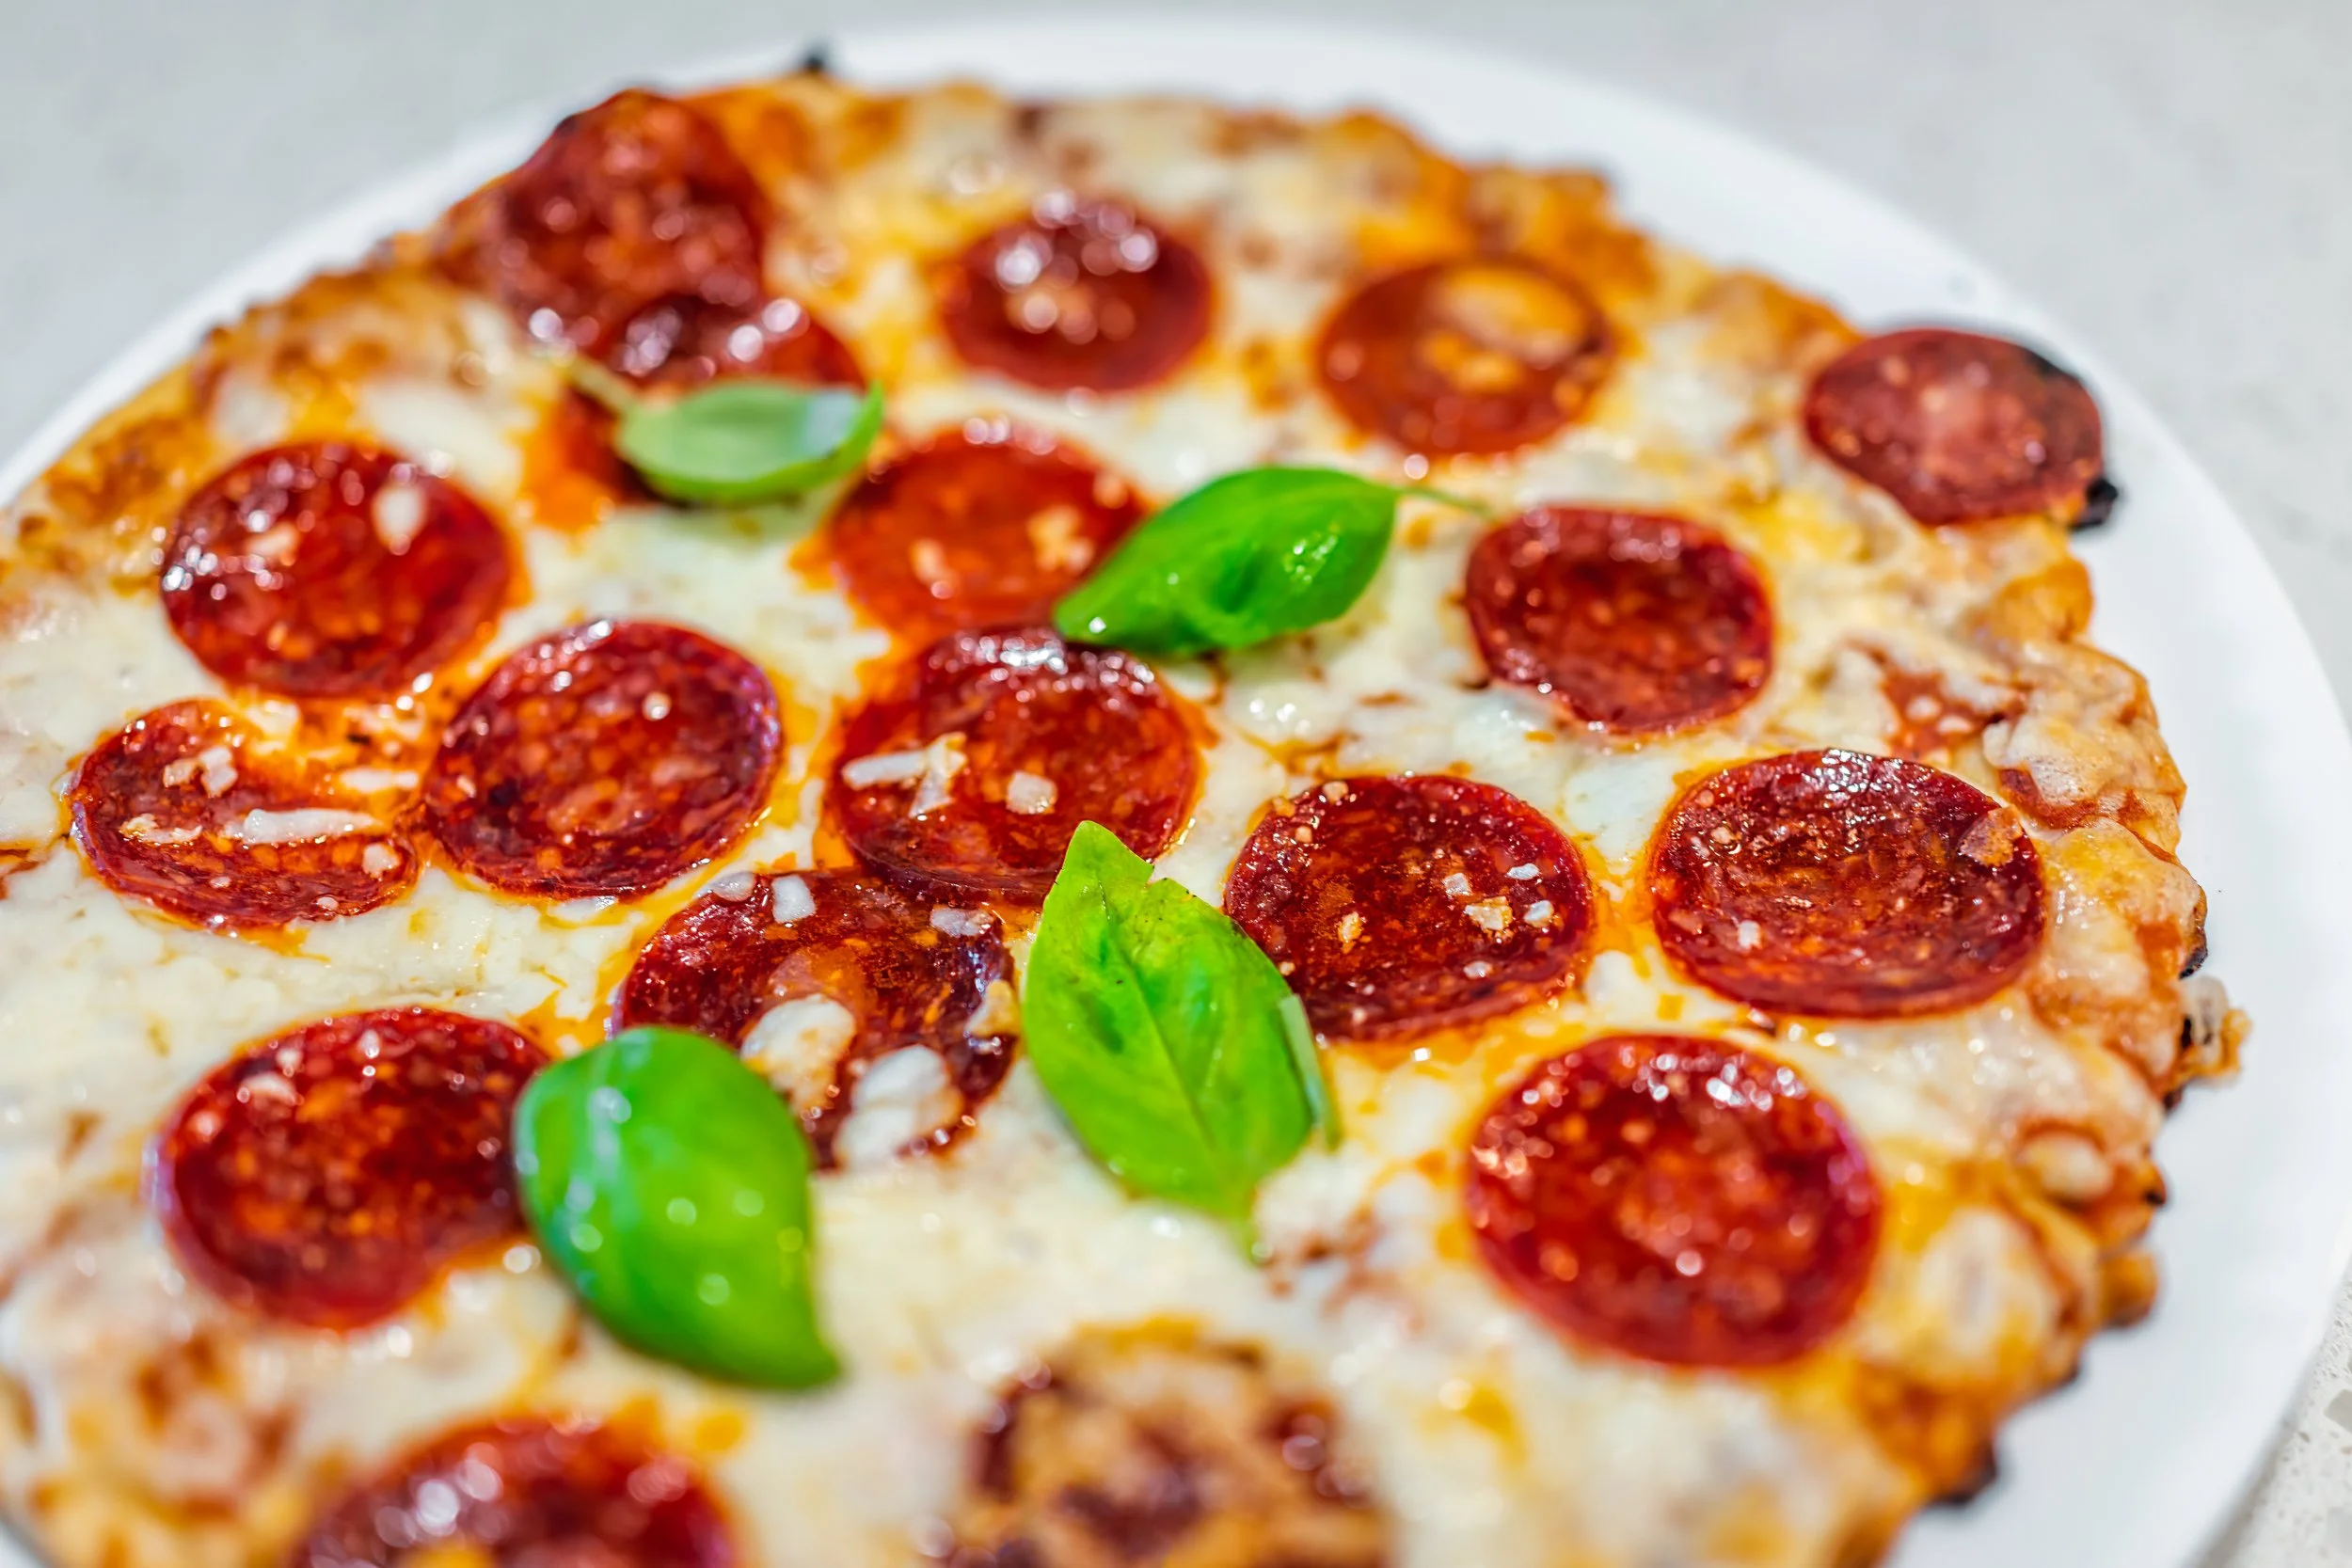
🍕Low-Fat Chicken Crust Pizza

Yes, this recipe is basically keto — but stay with me, because this one actually has a purpose. This low-fat chicken crust pizza is designed for the people (maybe your friends, maybe your keto parents who still think carbs cause obesity 😘) who can’t tolerate sourdough, rice, or starches yet while they’re still healing their gut, reversing restrictive dieting history, or working through IMO/SIBO recovery.
It’s not meant to be a lifestyle. It’s a temporary bridge food for the “between phase” — when your gut isn’t ready for starch, but you still want something comforting and savory that doesn’t wreck your digestion or blow your fat budget.
And because it is technically keto but we’re not doing that anymore, the solution is simple:
👉 Drink a big glass of lemonade with it.
Easy carbs, zero gut drama, still metabolically supportive.
This pizza also happens to be the perfect “peace offering” meal when your keto parents come over for dinner and are secretly judging your orange juice. Serve them this high-protein, low-fat, digestively gentle pizza… then sip your lemonade and smile, knowing you’re living in 2025 and they’re still stuck in 2017. 😉
Once your gut is healed and you’re tolerating starch again, go back to your sourdough or gluten-free rice crust — but for now, here’s a low-fat pizza that actually works.
Ingredients
Chicken Crust
1 lb ground chicken breast
1 egg white (optional, helps bind)
½–1 tsp salt
½ tsp garlic powder
½ tsp onion powder
½ tsp oregano
¼ tsp black pepper
(Option: 1–2 tbsp grated parmesan for flavor with minimal added fat.)
Toppings
¼–⅓ cup clean marinara or crushed tomatoes
Turkey pepperoni (very low fat)
Part-skim OR fat-free mozzarella, shredded
Use a small amount - like ½ cup
Fresh basil (optional)
How to Choose a Clean Light Mozzarella
Best Ingredients (✔️ clean):
skim milk
milk protein concentrate
salt
citric acid
calcium chloride
enzymes
Avoid (added junk):
modified food starch
gums (guar, xanthan, locust bean)
maltodextrin
potato starch
artificial colors
long ingredient lists
Look for the shortest ingredient list — ideally just milk, enzymes, salt, and citric acid.
Instructions
1. Make the Crust
Preheat oven to 400°F.
Mix ground chicken with spices (and egg white if using).
Line a baking sheet with parchment.
Press chicken mixture into a thin, even crust (¼–⅓ inch thick).
Bake 20–25 minutes, until cooked through and lightly browned.
2. Add Toppings
Spread marinara or crushed tomatoes over the cooked crust.
Add a light sprinkle of mozzarella (fat-free or part-skim), then turkey pepperoni.
3. Bake Again
Return to the oven for 8–10 minutes until the cheese melts.
Broil for 1–2 minutes if you want browning.
4. Slice + Enjoy
Let it cool 2–3 minutes for easier slicing.
Top with fresh basil or red pepper flakes.
Macros (Entire Pizza)
Using 1 lb 99% lean chicken, ⅓ cup fat-free mozzarella, light turkey pepperoni:
Calories: ~520–560
Protein: 90–100g
Carbs: 10–15g
Fat: 8–12g
(Part-skim mozzarella adds ~3–4g more fat per ⅓ cup.)
Notes for Variation
Adding ricotta dollops works for clients who prefer creamy over melty.
Fat-free mozzarella melts better than most expect — great for cut phases.
Part-skim mozzarella gives the most authentic pizza flavor with very little fat.
Increase protein even further by adding extra turkey pepperoni or mixing 1 scoop collagen into the marinara before spreading.

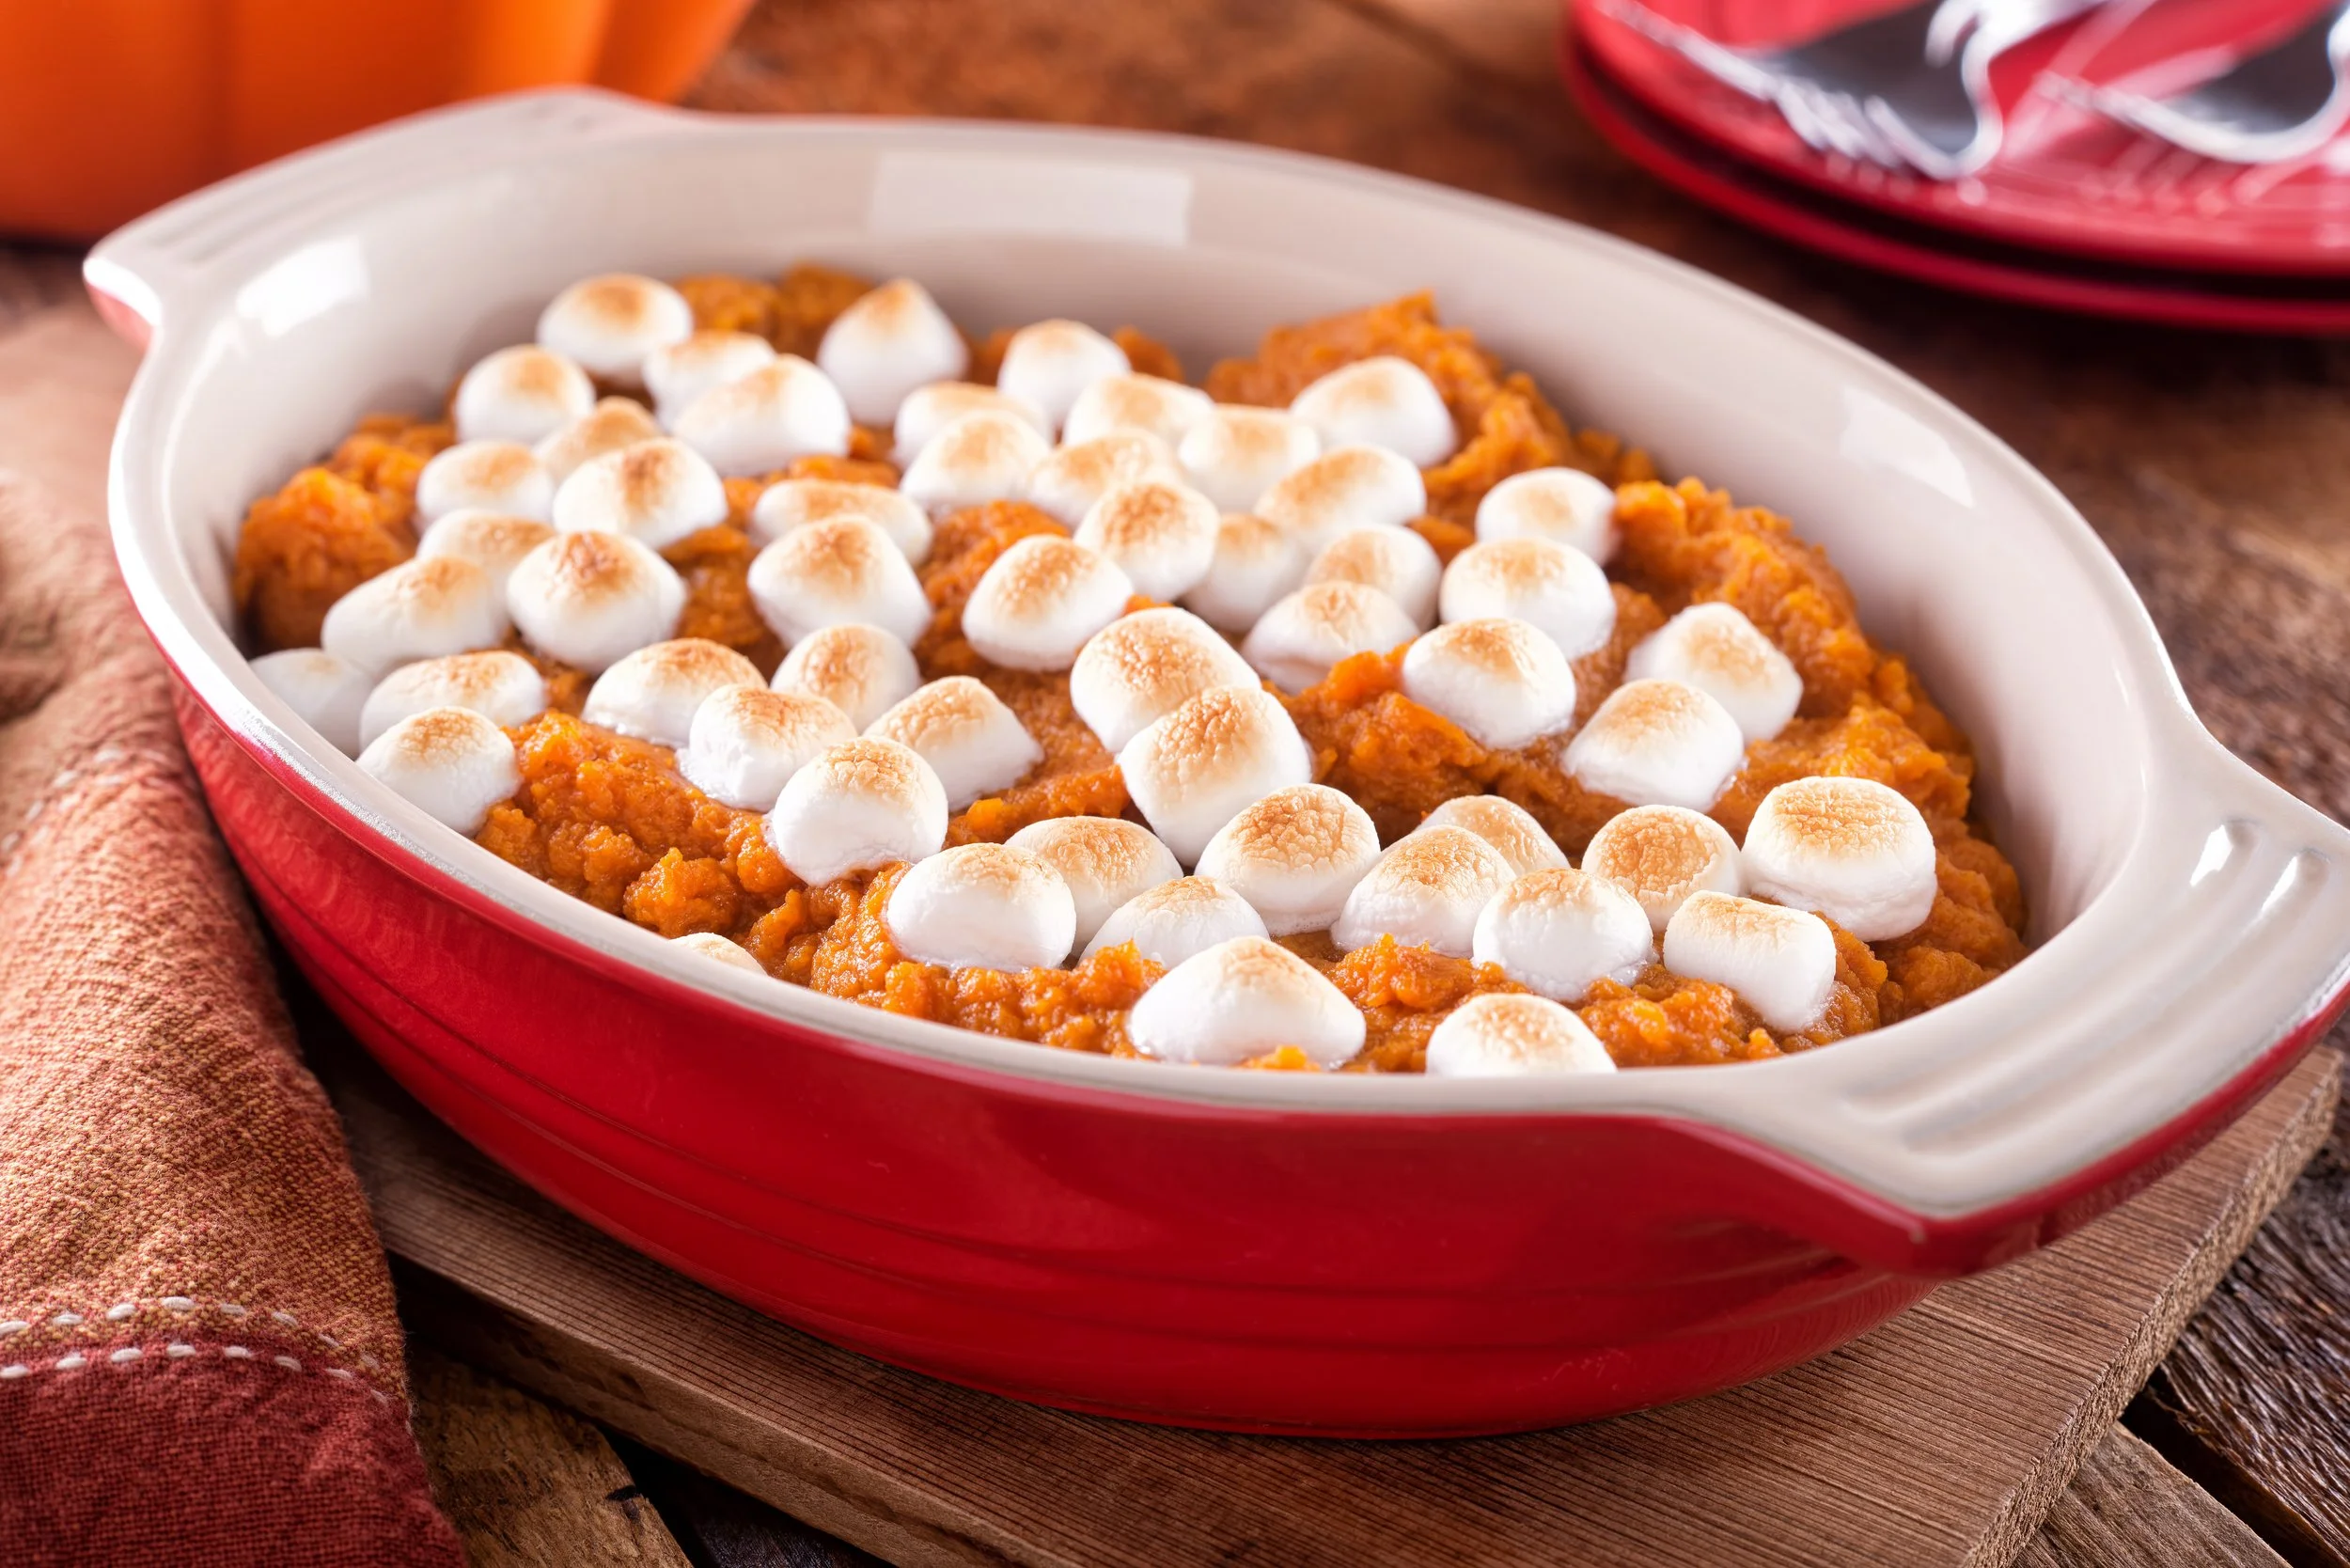
🍠 Sweet Potato Bake with Homemade Maple Marshmallows
This is the Thanksgiving dish you don’t have to feel conflicted about — because it’s actually pro-metabolic at its core. Our great-grandparents made meals built around lean protein, tubers, real sugar, low fat, and whole-food carbs long before “metabolic health” was even a term.
A plate of turkey breast, low-fat pan gravy, sourdough stuffing, sweet potatoes, cranberry sauce, and pumpkin pie is shockingly close to the exact macro pattern that supports thyroid function, stable blood sugar, liver glycogen, and warm hands. This sweet potato bake fits right into that ancestral blueprint — whipped, silky potatoes sweetened with mineral-rich maple syrup and topped with gut-friendly homemade gelatin marshmallows. It’s nostalgic, festive, and metabolically aligned without sacrificing flavor or tradition.
Ingredients
Sweet Potato Base
3 large sweet potatoes, peeled & cubed (about 3 lbs)
2–3 Tbsp butter (optional but recommended)
1/4 cup maple syrup
1/4 cup orange juice
2 tsp vanilla extract
1/2 tsp salt
Optional: 1/2 tsp cinnamon or pumpkin pie spice
Homemade Maple Marshmallows
(Fluffy, clean, gut-friendly gelatin marshmallows)
1 cup maple syrup
1/2 cup water, divided
3 Tbsp grass-fed gelatin
1 tsp vanilla
Pinch of salt
Note: Commercial clean marshmallows are rare. The only borderline options with decent ingredients use tapioca syrup + gelatin (e.g., some paleo brands), but they still add weird stabilizers. Making your own is genuinely the cleanest.
Instructions
1. Make the Sweet Potato Base
Preheat oven to 375°F.
Boil sweet potatoes until soft (10–12 minutes), then drain.
Add:
Butter
Maple syrup
Orange juice
Vanilla
Salt
Optional spices
Mash or whip with a hand mixer until smooth and silky.
Spread into a casserole dish.
2. Make the Marshmallows
In a mixing bowl, add:
3 Tbsp gelatin + 1/4 cup water.
Let it bloom.In a saucepan, heat:
1 cup maple syrup
1/4 cup water
Pinch of salt
Bring to a boil, then cook until 240°F (soft-ball stage).
Slowly pour the hot syrup into the gelatin while mixing on high.
Beat 8–10 minutes until thick, glossy, marshmallowy.
Spread on a lightly oiled parchment sheet and let set 2 hours.
Cut into cubes.
(You can also pipe the marshmallow directly onto the casserole if you want it extra rustic.)
3. Assemble & Bake
Add marshmallows on top of the sweet potato base.
Bake at 375°F for 12–15 minutes until golden on top.
If you like a toasted finish, broil for 20–30 seconds at the end.
Macros (approx., per serving of 8)
This depends on marshmallow size, but roughly:
Fat: 3–4g
Protein: 4–5g (from gelatin)
Carbs: 40–45g
Calories: ~210–230

🍁High-Protein Maple Marshmallows

These pro-metabolic maple marshmallows are everything store-bought marshmallows aren’t: no corn syrup, no additives, no seed oils, no refined sugar.
Just maple syrup, gelatin, water, vanilla, and salt — plus an optional collagen boost for extra protein.
They whip up exactly like classic marshmallows, but with a mineral-rich sweetener and a protein upgrade.
Why Gelatin Marshmallows?
Gelatin gives marshmallows their signature bounce, and it’s naturally rich in glycine — a pro-metabolic amino acid that supports gut lining, thyroid conversion, sleep, and collagen repair.
By increasing the gelatin (and adding a little collagen), you get a marshmallow that actually contributes to your protein intake while still being soft, fluffy, and perfectly sweet.
Ingredients
Base recipe:
1 cup maple syrup
2 tbsp grass-fed gelatin (for higher protein; see notes)
1/3 cup water (for blooming)
1 tsp vanilla extract
Pinch of salt
Optional protein boost:
2–4 tbsp collagen peptides, added during final whipping
Instructions
1. Bloom the gelatin
Add 1/3 cup water to the bowl of a stand mixer.
Sprinkle 2 tbsp gelatin evenly over the top and let it bloom for 5–10 minutes.
2. Heat the maple syrup
Pour 1 cup maple syrup into a small saucepan with a pinch of salt.
Bring to a gentle boil over medium heat and cook for 6–8 minutes, or until it reaches 240°F (soft-ball stage).
If you don’t want to use a thermometer, heat until it’s bubbling vigorously and thickening slightly.
3. Whip it
Turn the mixer to low to break up the bloomed gelatin.
Slowly pour the hot maple syrup down the side of the bowl.
Once everything is in, turn the mixer to high.
4. Whip until fluffy
Whip for 7–10 minutes until the mixture becomes light, glossy, and tripled in volume.
Add vanilla extract in the last 30 seconds.
Optional: Add 2–4 tbsp collagen peptides in the final 60 seconds of whipping for extra protein without changing the texture.
5. Pour and set
Line an 8×8 pan with parchment and lightly grease it.
Spread the marshmallow mixture evenly into the pan using a greased spatula.
Let it set at room temperature for 4 hours, or overnight.
6. Slice and store
Cut into squares with a knife dusted in arrowroot or gelatin (optional, but keeps edges clean).
Store in an airtight container for up to 5 days.
Protein + Macro Breakdown
With 2 tbsp gelatin + 4 tbsp collagen (protein-boost version):
Full batch:
Calories: ~966
Protein: 26g
Carbs: 210g
Fat: 0g
Per marshmallow (cut into 16 squares):
Calories: ~60
Protein: 1.6g
Carbs: ~13g
Fat: 0g
If you want to hit a different protein per piece, I can customize ratios.
Tips for Perfect Maple Marshmallows
Use Grade A dark maple for the richest flavor.
For a softer marshmallow, add 2 extra tablespoons of water to the bloom.
For a firmer, higher-protein marshmallow, increase gelatin to 3 tbsp (gummier and great for cocoa).
Maple scorches faster than sugar — if roasting, keep the flame low.
Mini cubes freeze beautifully for topping smoothies or hot chocolate.
FAQ
Can I make these without a stand mixer?
Yes — a powerful hand mixer works, you’ll just whip 1–2 minutes longer.
Can I use honey instead of maple?
Yes, but the flavor becomes stronger and they set a bit firmer.
Do marshmallows really need collagen?
No — it’s optional. Gelatin provides the structure; collagen simply bumps the protein without affecting texture.
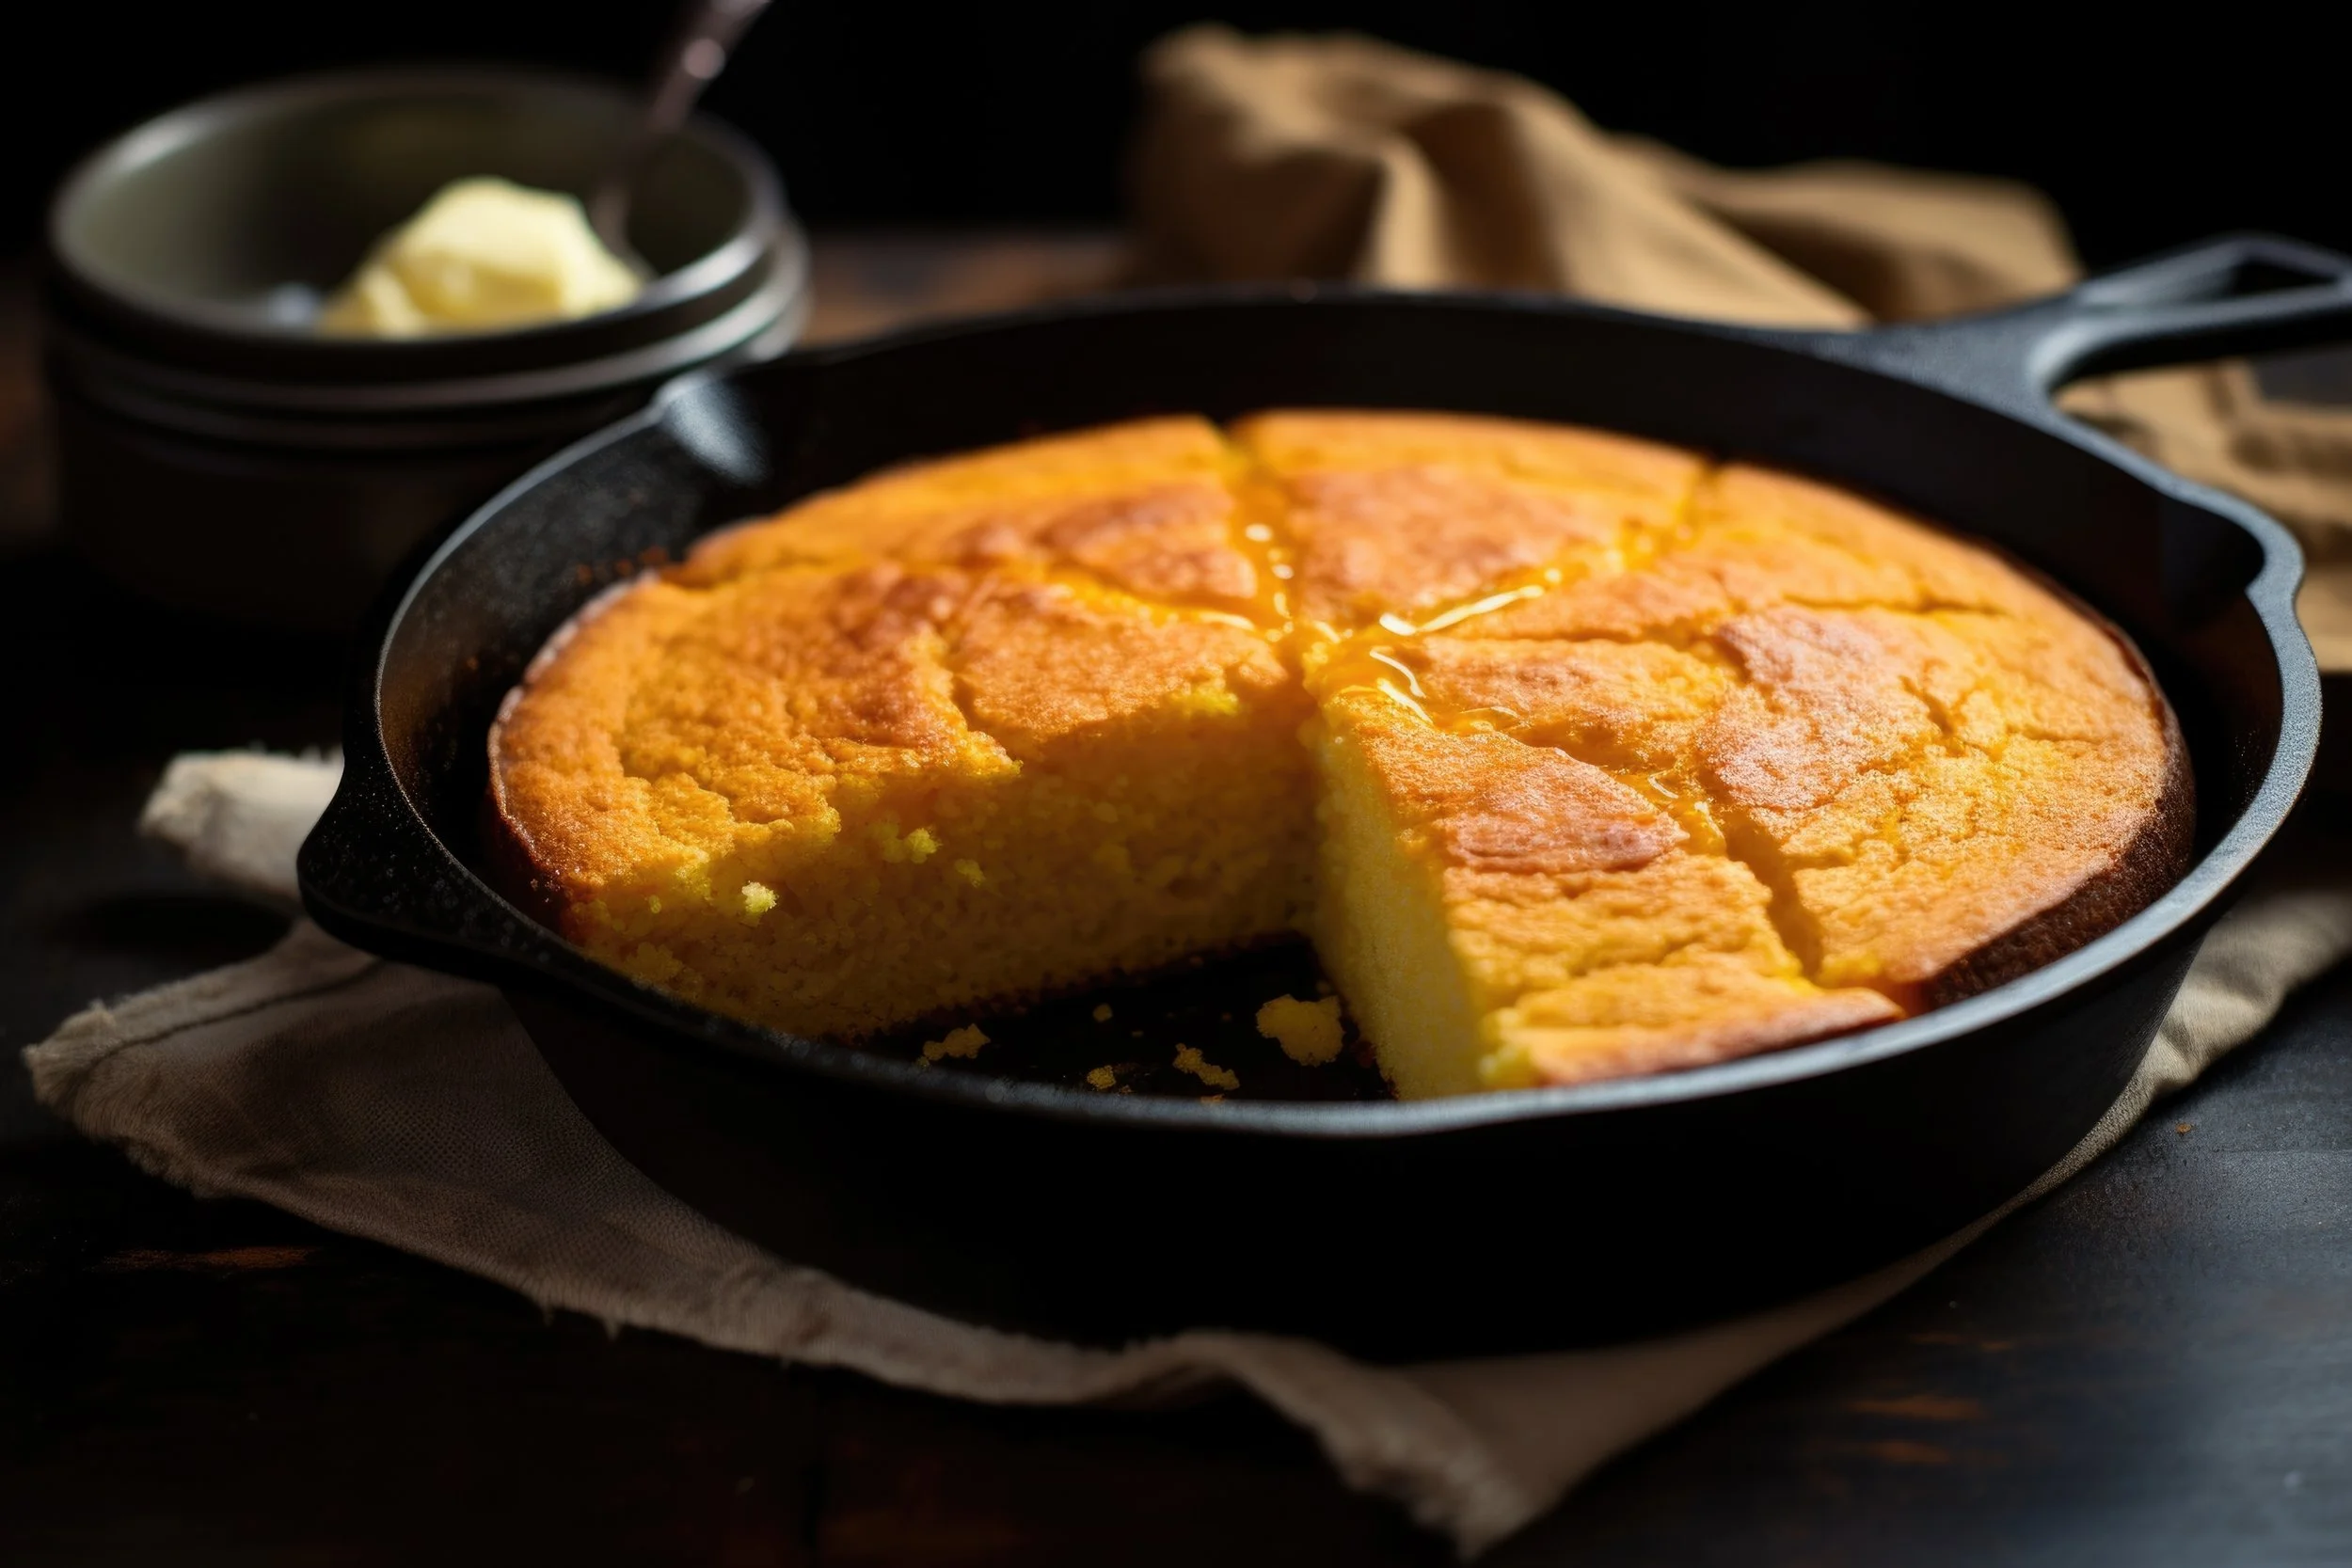
🌽 Masa Harina Cornbread

If you want cornbread that’s easy to digest, low-fat, pro-metabolic, and made entirely from masa harina, this is it. No wheat flour, no seed oils, and no heavy fats weighing you down. Masa hydrates beautifully and gives you that classic cornbread flavor with a tender, moist crumb. Using 2 tablespoons of butter adds classic richness and better browning, but the recipe still works beautifully without it. Even with the butter included, this stays firmly in the low-fat category and pairs perfectly with pro-metabolic meals.
Ingredients
1 ½ cups masa harina
1 cup warm skim milk
½ cup orange juice
¼–⅓ cup sugar or maple syrup
2 tablespoons butter, melted
1 egg white
1 teaspoon baking powder
½ teaspoon baking soda
½ teaspoon salt
1 teaspoon vanilla (optional)
Instructions
Preheat oven to 375°F. Line an 8×8 baking pan with parchment.
In a bowl, whisk together the masa harina, baking powder, baking soda, and salt.
In a separate bowl, combine the skim milk, orange juice, sugar/maple syrup, melted butter (if using), egg white, and vanilla.
Pour the wet mixture into the dry mixture and stir until smooth. The batter should be thick but pourable; add a splash of milk if needed.
Spread evenly into the prepared pan.
Bake for 20–23 minutes, until the edges are lightly golden and the top springs back to the touch.
Cool for 10 minutes before slicing.
Notes & Tips
With butter: The crumb is richer, sweeter, and more classic.
Without butter: Still tender and moist thanks to the OJ and milk.
Orange juice improves softness and enhances corn flavor.
Keep fat low by serving with honey, maple syrup, or fruit instead of heavy spreads.
Nutrition (per slice, 8 slices)
With 2 tablespoons butter:
Carbs: ~28–30g
Protein: ~3–4g
Fat: ~2.5–3g
Without butter:
Fat: ~0.5–1g

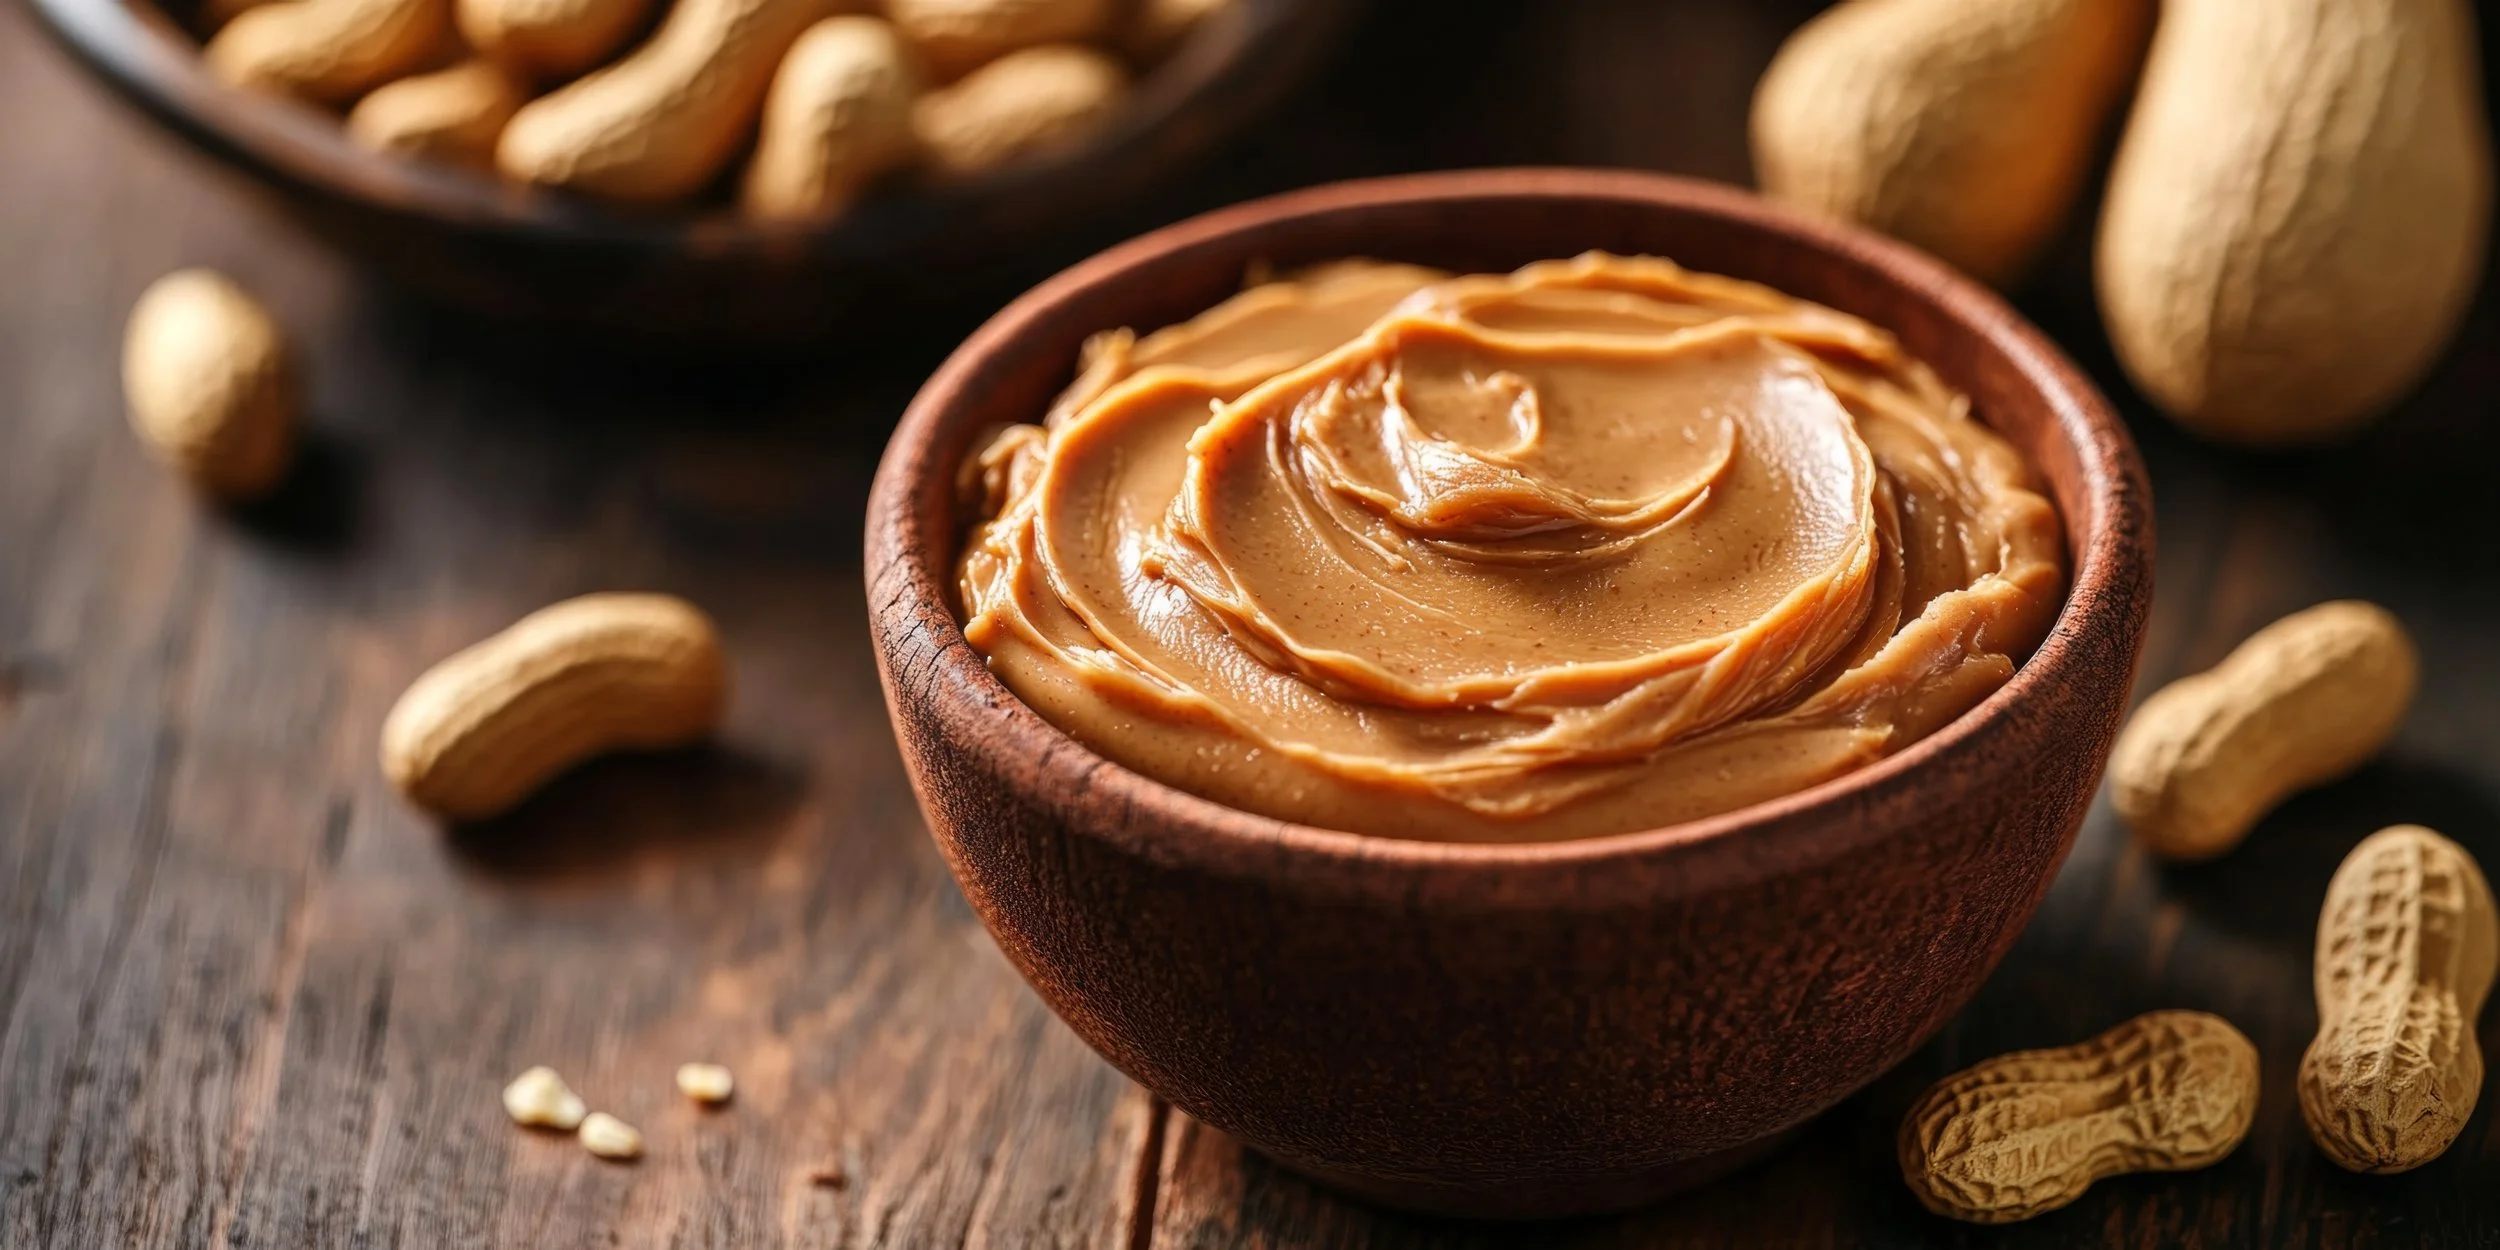
🥜 Real Peanut Butter — Without the PUFA Bomb
Most people think “natural peanut butter” is clean — just peanuts and salt, right?
Wrong. Peanuts aren’t nuts at all; they’re legume seeds. Which means their oil is technically a seed oil — and it’s loaded with the same unstable polyunsaturated fats (PUFAs) that we avoid in soy, canola, sunflower, and corn oil.
Peanut oil is roughly 30–35% linoleic acid, the exact fatty acid shown to suppress thyroid function, lower metabolic rate, and make cell membranes more fragile to oxidation. Combine that with roasting at high temps and you’ve got a jar full of oxidized fat and endocrine noise masquerading as “healthy protein.”
The flavor is great — but the fat isn’t. That’s why PB2 (defatted peanut flour) is the metabolic hack: all the protein, potassium, and roasted flavor of peanuts without the oil that slows you down. Add back a little water, honey, and salt, and you’ve got the taste of peanut butter with none of the sluggish, oily baggage.
🧪 The No-Fat Peanut Butter Recipe
Ingredients (1 serving):
2 tbsp Organic PB2 or defatted peanut flour (~12 g)
1½ tbsp warm water (~22 g)
½ tsp raw honey (~3–4 g)
1 tiny pinch fine sea salt (~1/32 tsp)
Optional upgrades:
Drop of vanilla extract
Sprinkle of coconut sugar for depth
👩🍳 Instructions
Combine PB2 and salt.
Stir in honey, then slowly add 1 tbsp warm water.
Mix until creamy; drizzle in the last ½ tbsp water to hit your perfect texture.
Let it rest 30–60 seconds — the peanut proteins hydrate and turn glossy and spreadable.
🍌 Macros (approx.)
Calories: ~70
Protein: 8 g
Carbs: 6 g
Fat: 1 g
🔥 Why It’s Better
By removing the peanut oil, you remove nearly all the linoleic acid — the same fat clogging modern metabolisms. What’s left supports thyroid output and clean energy instead of slowing it down. You get the comfort of peanut butter, the flavor you love, and the metabolic freedom your cells crave.

☕ Pro-Metabolic Collagen Latte

This creamy, energizing latte is more than just coffee—it’s a liquid mini-meal designed to nourish your thyroid, stabilize blood sugar, and support glowing skin and hair. The mix of caffeine, protein, sugar, and minerals keeps your metabolism humming instead of crashing. Perfect for early mornings or pre-workout when you want warmth, fuel, and focus in one cup.
🥛 Ingredients
1 cup strong organic coffee or 2 shots espresso (single-origin, mold-tested brands like Lifeboost or Death Wish)
1 cup foamed or warm skim milk
1–2 tbsp maple syrup (adjust sweetness to taste)
Dash mineral-rich sea salt
2 tbsp collagen powder (such as Vital Proteins)
💪 Directions
Brew your coffee or espresso.
Warm or froth your milk until steamy and velvety.
Stir in collagen, maple syrup, and a pinch of salt until fully dissolved.
Pour milk over coffee, give it a swirl, and sip your metabolism-boosting magic.
⚡ Health Benefits
Caffeine + Sugar: Together, they enhance liver glycogen storage and raise metabolic rate without stressing cortisol.
Skim Milk: Provides bioavailable calcium, potassium, and carbs to support thyroid conversion and steady blood sugar.
Maple Syrup: Gentle, natural glucose source rich in trace minerals like manganese and zinc.
Collagen: Supports gut lining, joints, hair, skin, and nails while delivering glycine for nervous system calm.
Salt: Balances adrenal stress and helps retain the minerals lost through caffeine.
📊 Macros (approximate, with 1 tbsp maple syrup)
Calories 180 kcal; Protein 18 g; Carbs 24 g; Fat 0.5 g
(With 2 tbsp maple syrup: ~210 kcal, 18 g protein, 36 g carbs, <1 g fat)
Pro tip: Add a sprinkle of cinnamon for blood sugar balance or a few drops of vanilla for a dessert-like flavor. This latte pairs beautifully with a side of orange juice or fruit for a balanced, pro-metabolic breakfast.

🌾 Oatmeal Molasses Coconut Cookies
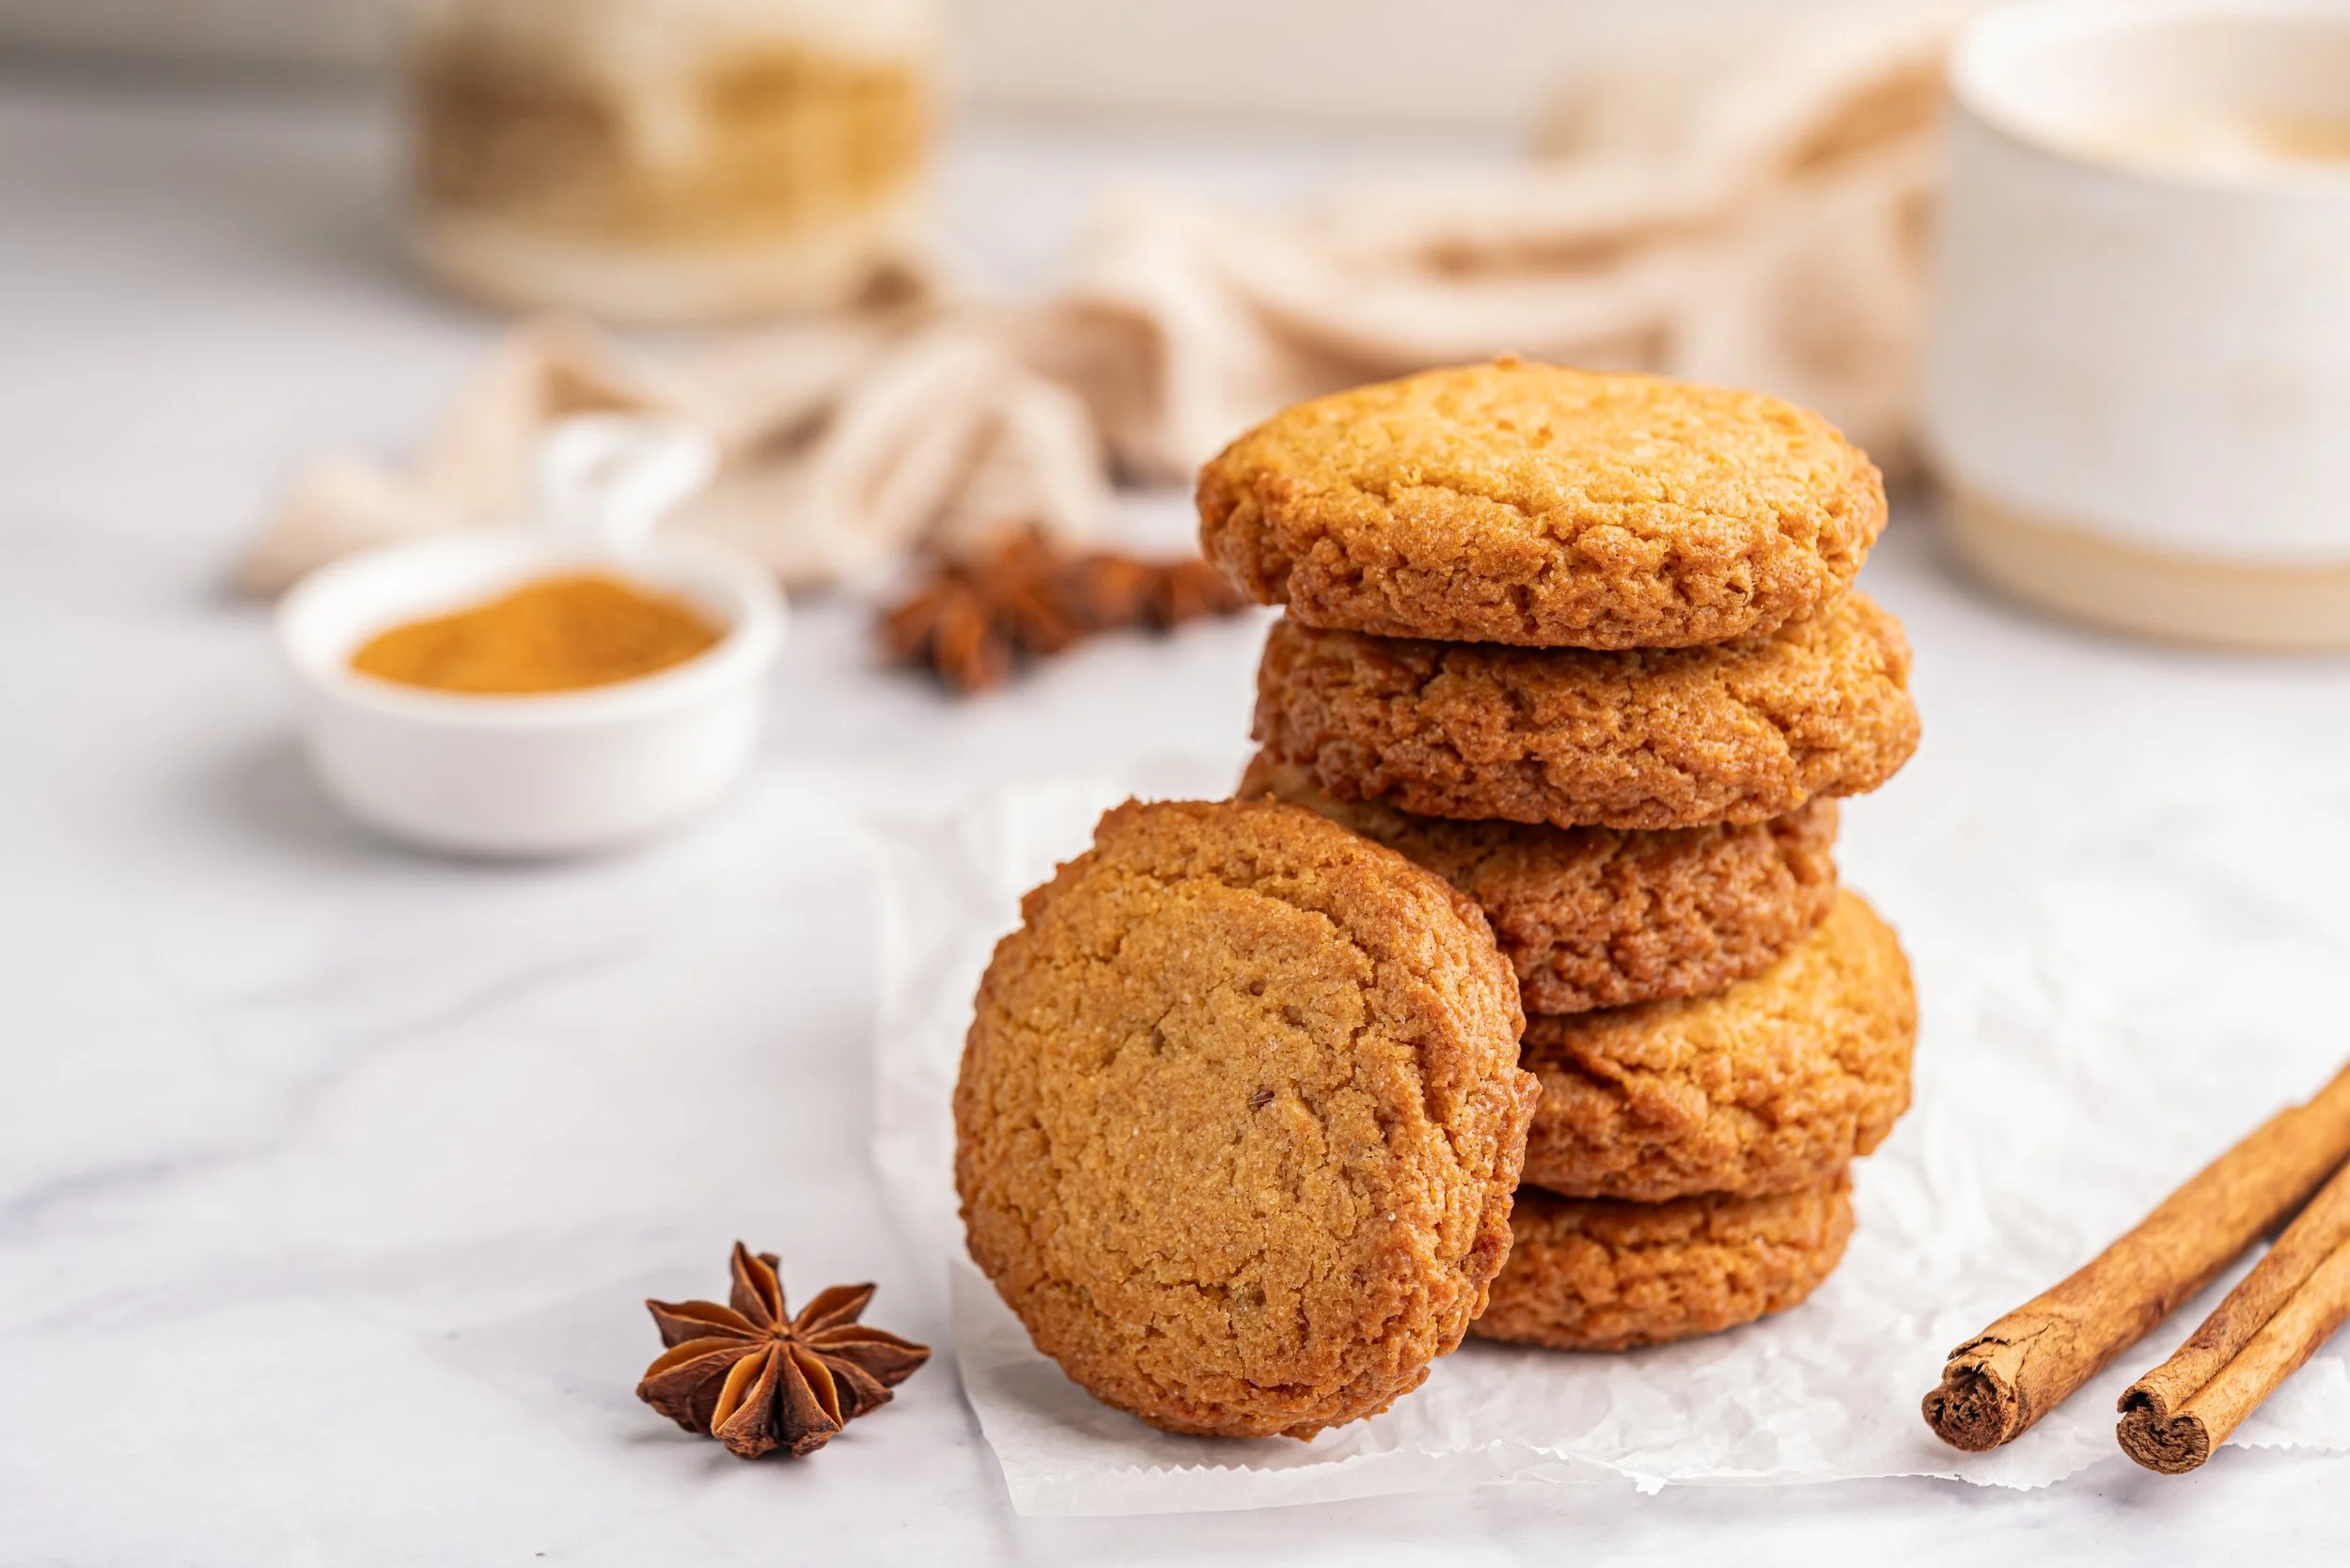
There’s nothing like the cozy aroma of molasses and cinnamon wafting from the oven. These oatmeal molasses coconut cookies are soft, chewy, and naturally bound with gelatin. The oats give them heartiness, the coconut adds texture, and the molasses brings that old-fashioned depth of flavor.
They’re quick to make (only 20 minutes from start to finish) and perfect for pairing with coffee or a cold glass of milk. Plus, the swap to gelatin keeps them wholesome and natural.
🍪 Recipe
Yield: 24 cookies
Prep Time: 10 minutes
Cook Time: 10 minutes
Total Time: 20 minutes
Ingredients
¼ cup unsalted butter, softened (or substitute with ¼ cup melted coconut oil)
½ cup granulated sugar
¼ cup molasses
1 teaspoon pure vanilla extract
1 large egg
1 cup white rice flour
1 teaspoon powdered gelatin (mixed into the dry ingredients)
½ teaspoon baking soda
½ teaspoon baking powder
½ teaspoon salt
½ teaspoon ground cinnamon
1½ cups sprouted oats
1 cup shredded unsweetened coconut
Instructions
Preheat oven to 350°F (175°C). Line a baking sheet with parchment paper.
In a large bowl, cream together the butter (or coconut oil), sugar, and molasses until smooth.
Beat in the vanilla extract and egg.
In a separate bowl, whisk together the flour, gelatin, baking soda, baking powder, salt, and cinnamon.
Combine the dry ingredients with the wet mixture until just blended.
Stir in the oats and shredded coconut until evenly incorporated.
Drop dough by rounded tablespoon onto the prepared baking sheet, spacing about 2 inches apart.
Bake for 8–10 minutes, or until the edges are golden brown.
Let cookies cool on the pan for 2 minutes, then transfer to a wire rack to cool completely.
📊 Macros (per cookie, 24 cookies total)
Calories: 102
Protein: 1.6 g
Carbohydrates: 14.3 g
Fat: 4.3 g
Fiber: 1.5 g
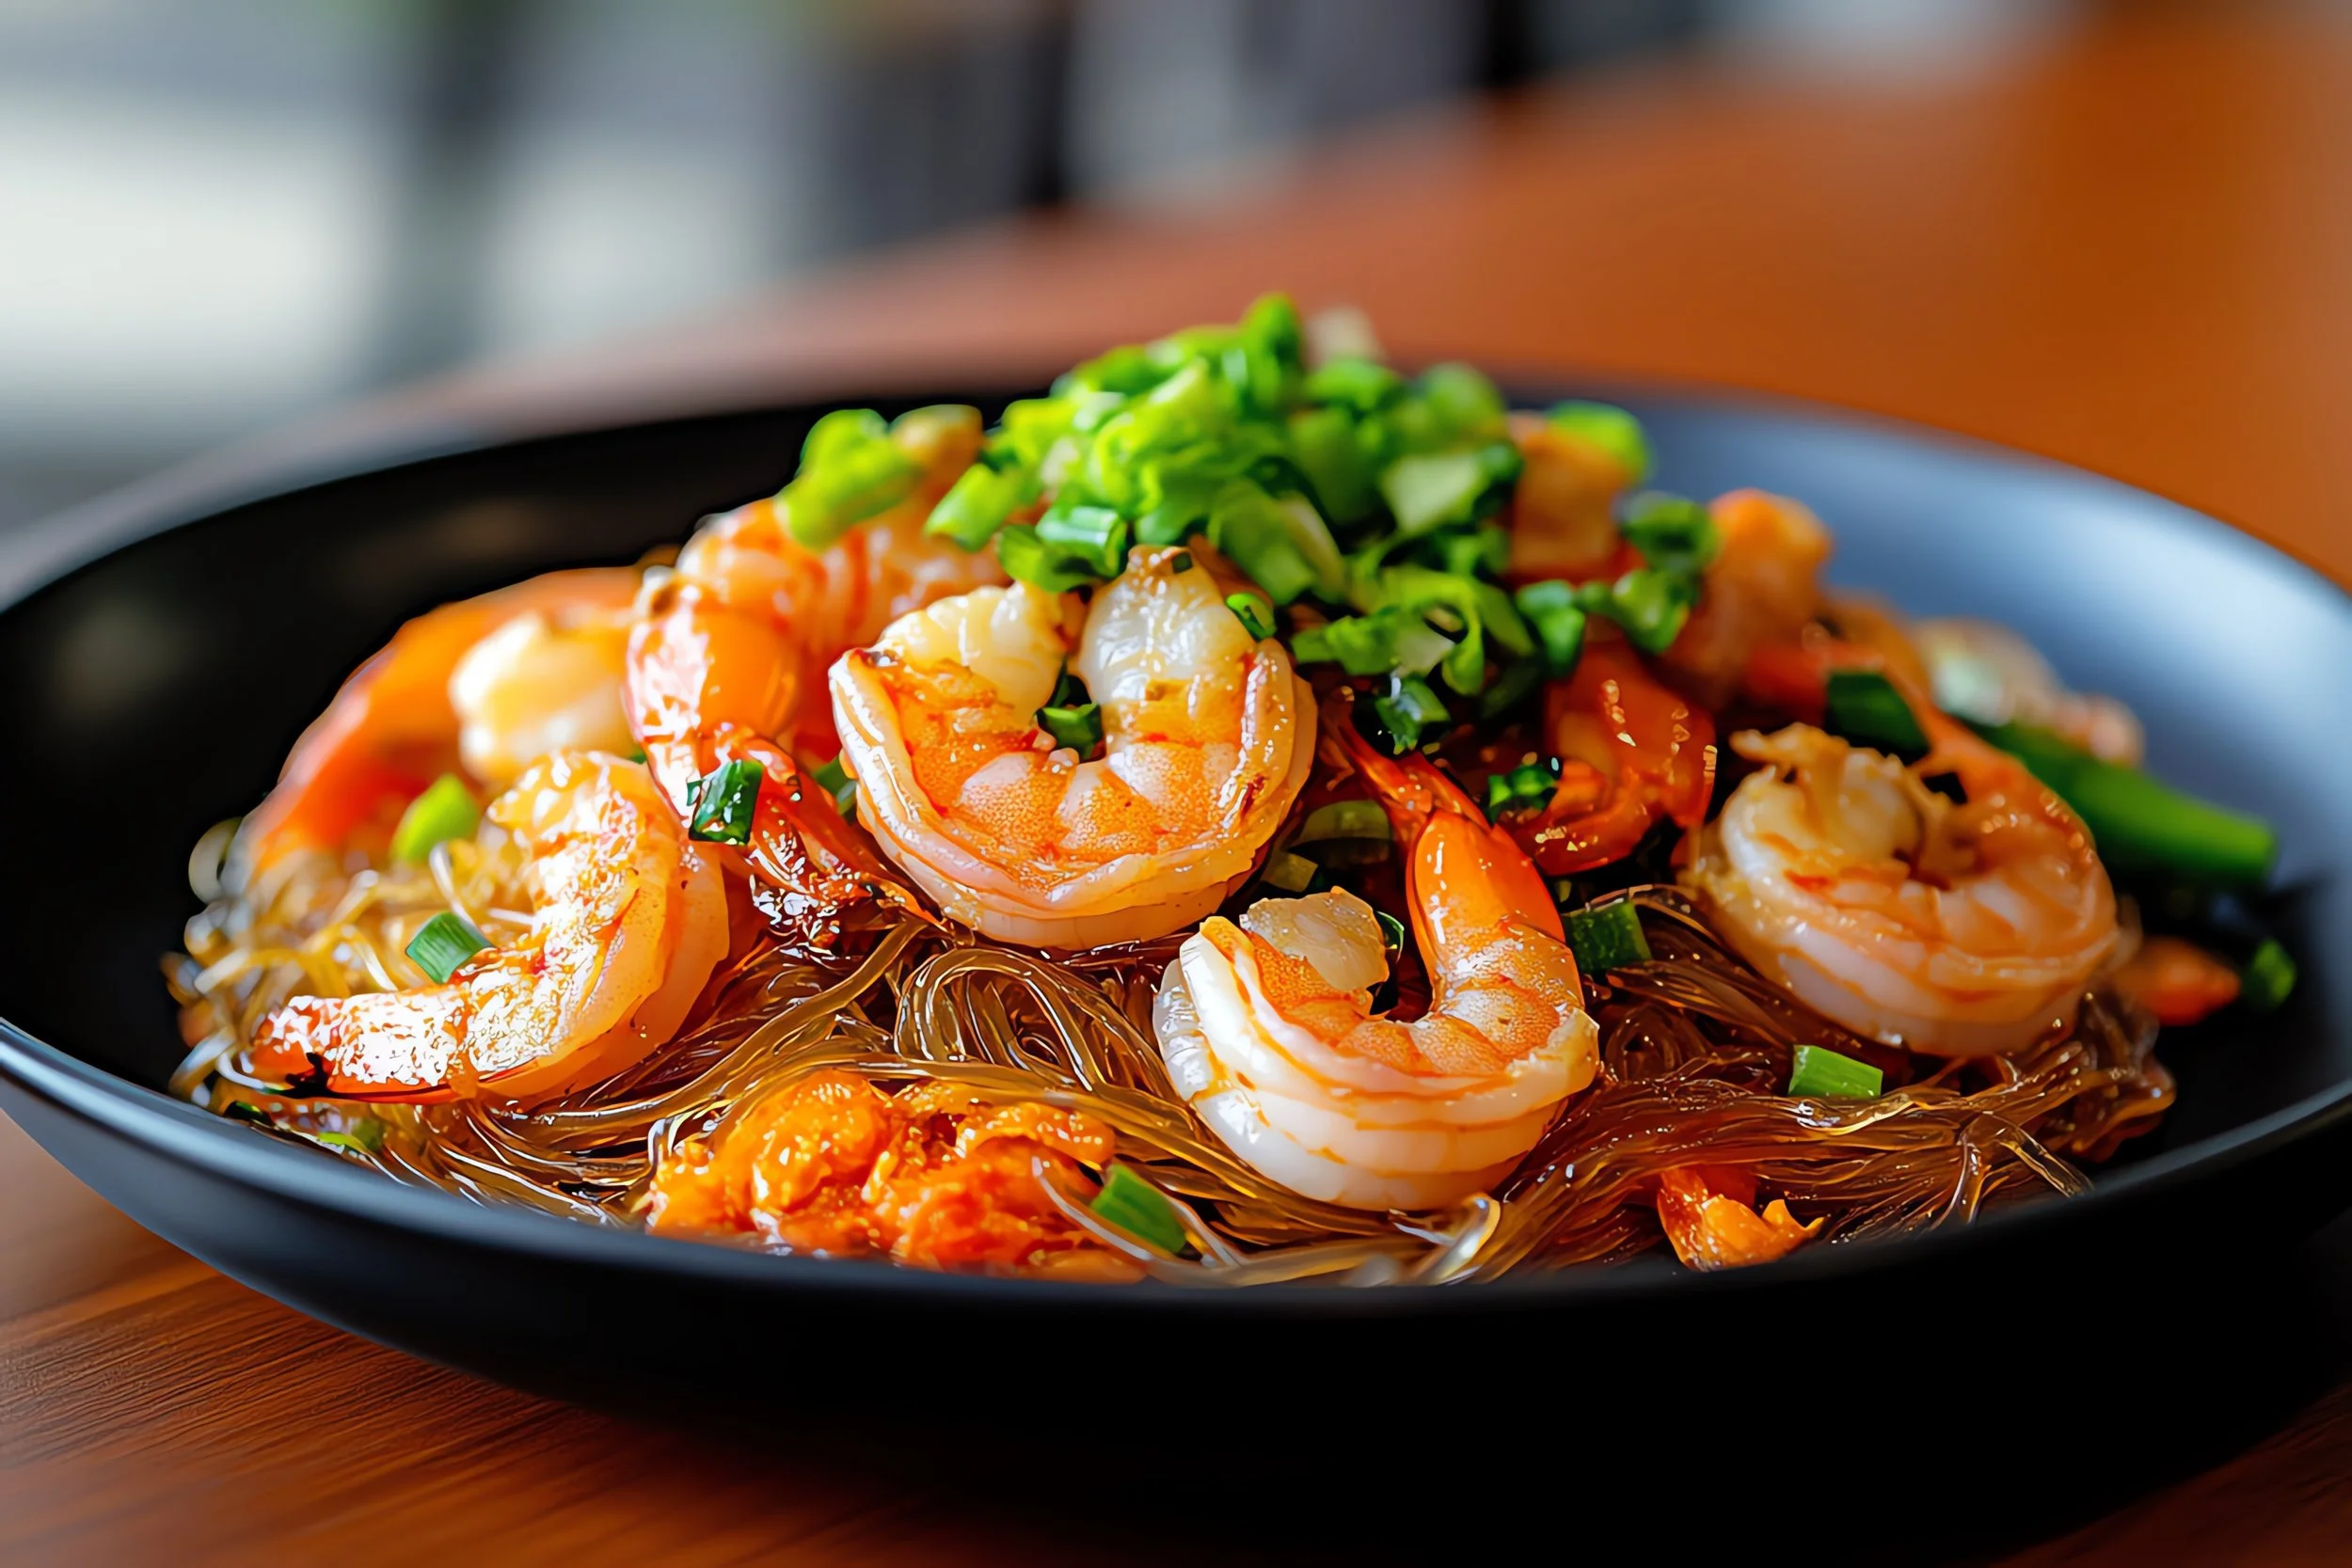
🍤 Japchae with Shrimp

Japchae is a classic Korean stir-fry that feels fancy but comes together in minutes. This pro-metabolic spin uses Costco’s Snak Yard sweet potato noodles, juicy shrimp, and colorful veggies tossed in a light, savory-sweet sauce. The result? A high-carb, low-fat, mineral-rich dish that’s as easy on digestion as it is beautiful on the plate — fun to eat and perfectly aligned with thyroid and metabolic health.
Ingredients (4 servings)
8 oz Snak Yard sweet potato noodles (dry weight)
1 lb shrimp, peeled and deveined (medium or large)
2 cups carrots, julienned
2 cups zucchini, julienned
1 medium onion, thinly sliced
1 red bell pepper, thinly sliced
2 scallions, sliced
3 cloves garlic, minced
Sauce:
3 tbsp coconut aminos (or clean soy sauce if tolerated)
1 tbsp maple syrup or honey
1 tbsp rice vinegar
½ tsp toasted sesame oil (optional for flavor — very low fat/PUFA contribution)
Sea salt to taste
Sriracha, optional
Cooking
1 tsp refined coconut oil or ghee (just for cooking the shrimp/veggies — keep minimal)
Instructions
Cook noodles
Boil noodles for 6–7 minutes until chewy. Drain, rinse cold, and snip shorter with scissors for easy mixing.
Cook shrimp
Heat a pan with ½ tsp coconut oil. Sear shrimp 1–2 minutes per side until pink and just cooked. Remove and set aside.
Cook veggies
In the same pan, add onion, carrots, zucchini, and bell pepper. Stir-fry 3–4 minutes until crisp-tender. Add garlic last 30 seconds.
Make sauce
Whisk together coconut aminos, maple/honey, vinegar, sesame oil (if using), white pepper, and salt.
Assemble
In a large bowl, toss noodles, shrimp, veggies, and sauce. Mix well.
Finish
Garnish with scallions and sriracha.

🥕 French-Inspired Pro-Metabolic Carrot Salad
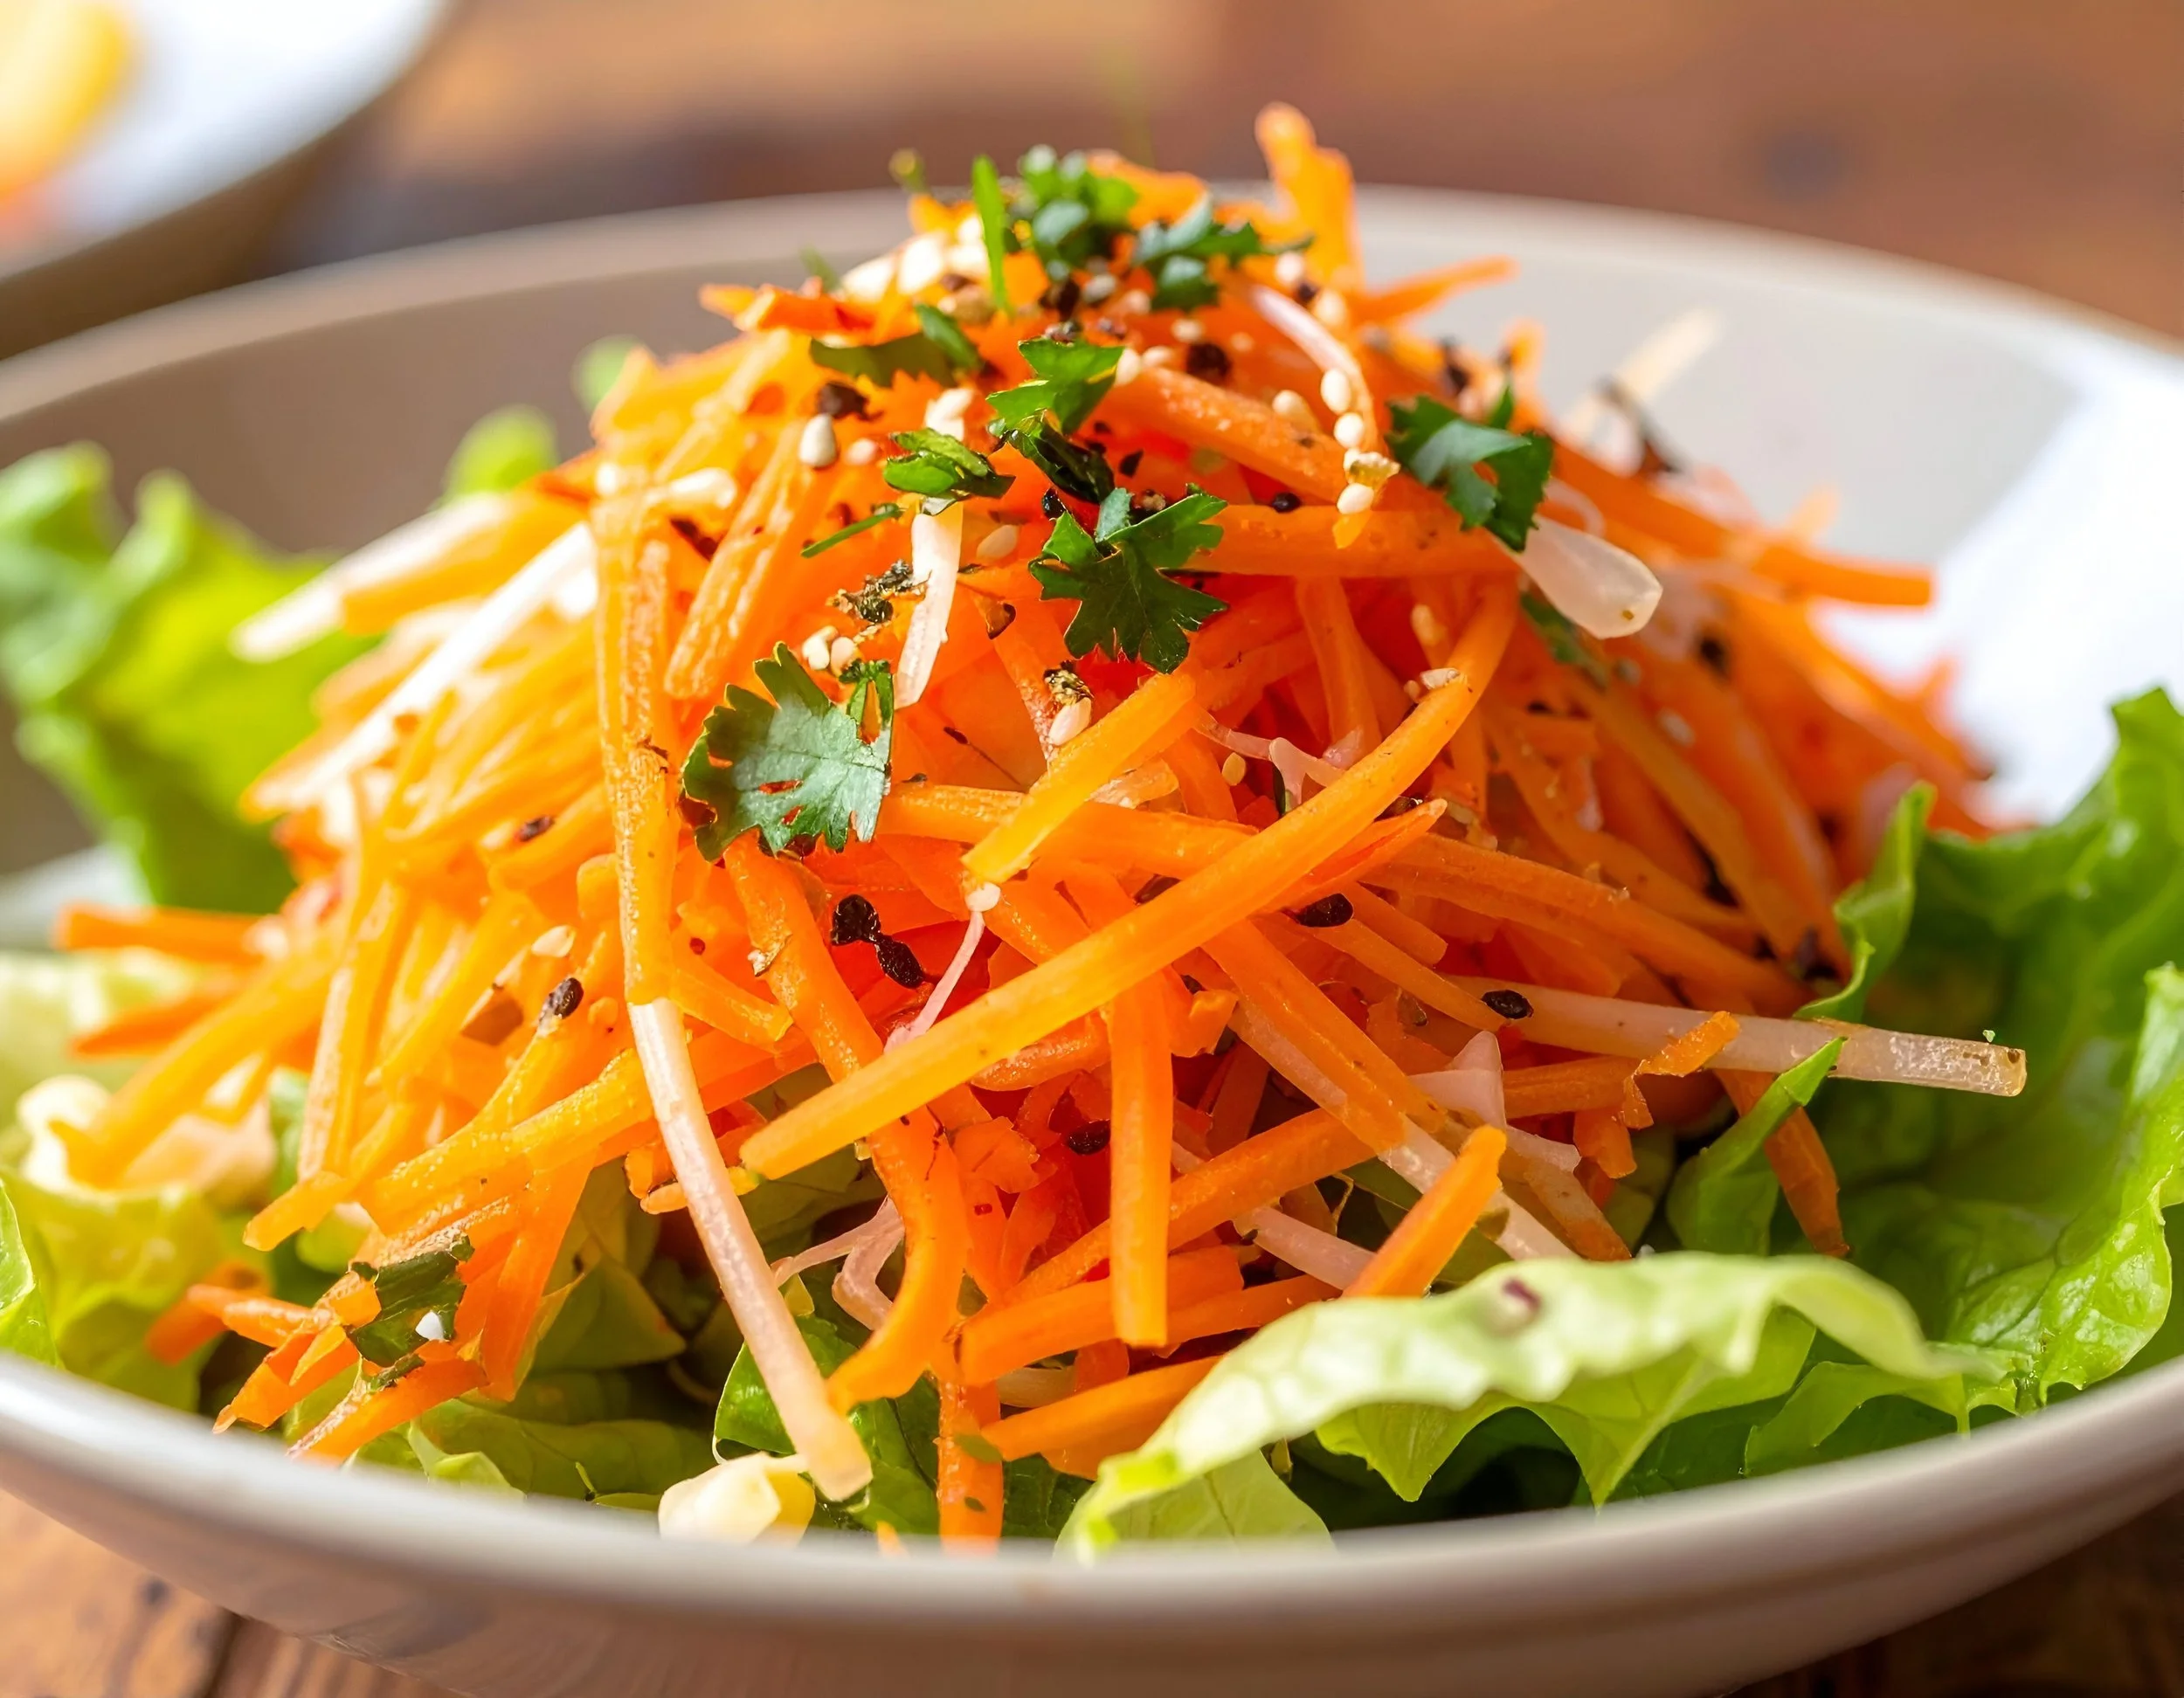
It looks like vegetables, but it’s medicine. Carrots are the number-one prebiotic - the food for our beneficial bacteria! This is a supplement that we need to take everyday like our D3 or magnesium. Feed your good bugs, and watch your digestion and gut heal - which means your mental health, mood, regularity, and food intolerances heal too.
Bright, crunchy, and full of metabolic-friendly nutrients, this carrot salad is a perfect side dish or light snack. Inspired by the classic carottes râpées served all over France, this version uses fresh lemon, raw honey, and just a splash of cold-pressed olive oil for flavor and hormone support—without loading up on fat. Ah, those French people are so damn healthy. How do they always know?
Ingredients
(Serves 4)
4 large carrots, peeled and grated (about 3 cups)
1 tablespoon freshly squeezed lemon juice (about ½ lemon)
1 teaspoon raw honey
1 teaspoon Dijon mustard (optional, for a more traditional taste)
1 oz of crumbed feta cheese OR another fat like 1-2 teaspoons cold-pressed extra virgin olive oil (Italian-imported, Kirkland, and Marianne’s are all third-party tested and pure)
¼ teaspoon sea salt (to taste)
1 tablespoon chopped fresh parsley (or chives, optional garnish)
Instructions
Prep the Carrots
Peel and grate the carrots using a box grater or food processor. Place in a medium bowl.Make the Dressing
In a small bowl or jar, whisk together the lemon juice, honey, mustard (if using), feta or olive oil, sea salt, and pepper.Combine & Toss
Pour the dressing over the grated carrots. Toss gently to coat all the strands evenly.Taste & Adjust
Taste and adjust seasoning. Add more lemon or salt if needed.Serve or Chill
Serve immediately, or refrigerate for 30 minutes to let the flavors meld. Garnish with fresh parsley just before serving.
Storage Tips
Store in an airtight container in the fridge for up to 3 days.
Flavor improves after a few hours—great for meal prep.
Pro-Metabolic Tips
Carrots support estrogen detox and are rich in fiber and carotenoids.
Use raw honey instead of white sugar for gentle sweetness and added minerals.
Olive oil adds flavor and helps absorb fat-soluble vitamins—but keep it light for metabolic balance.

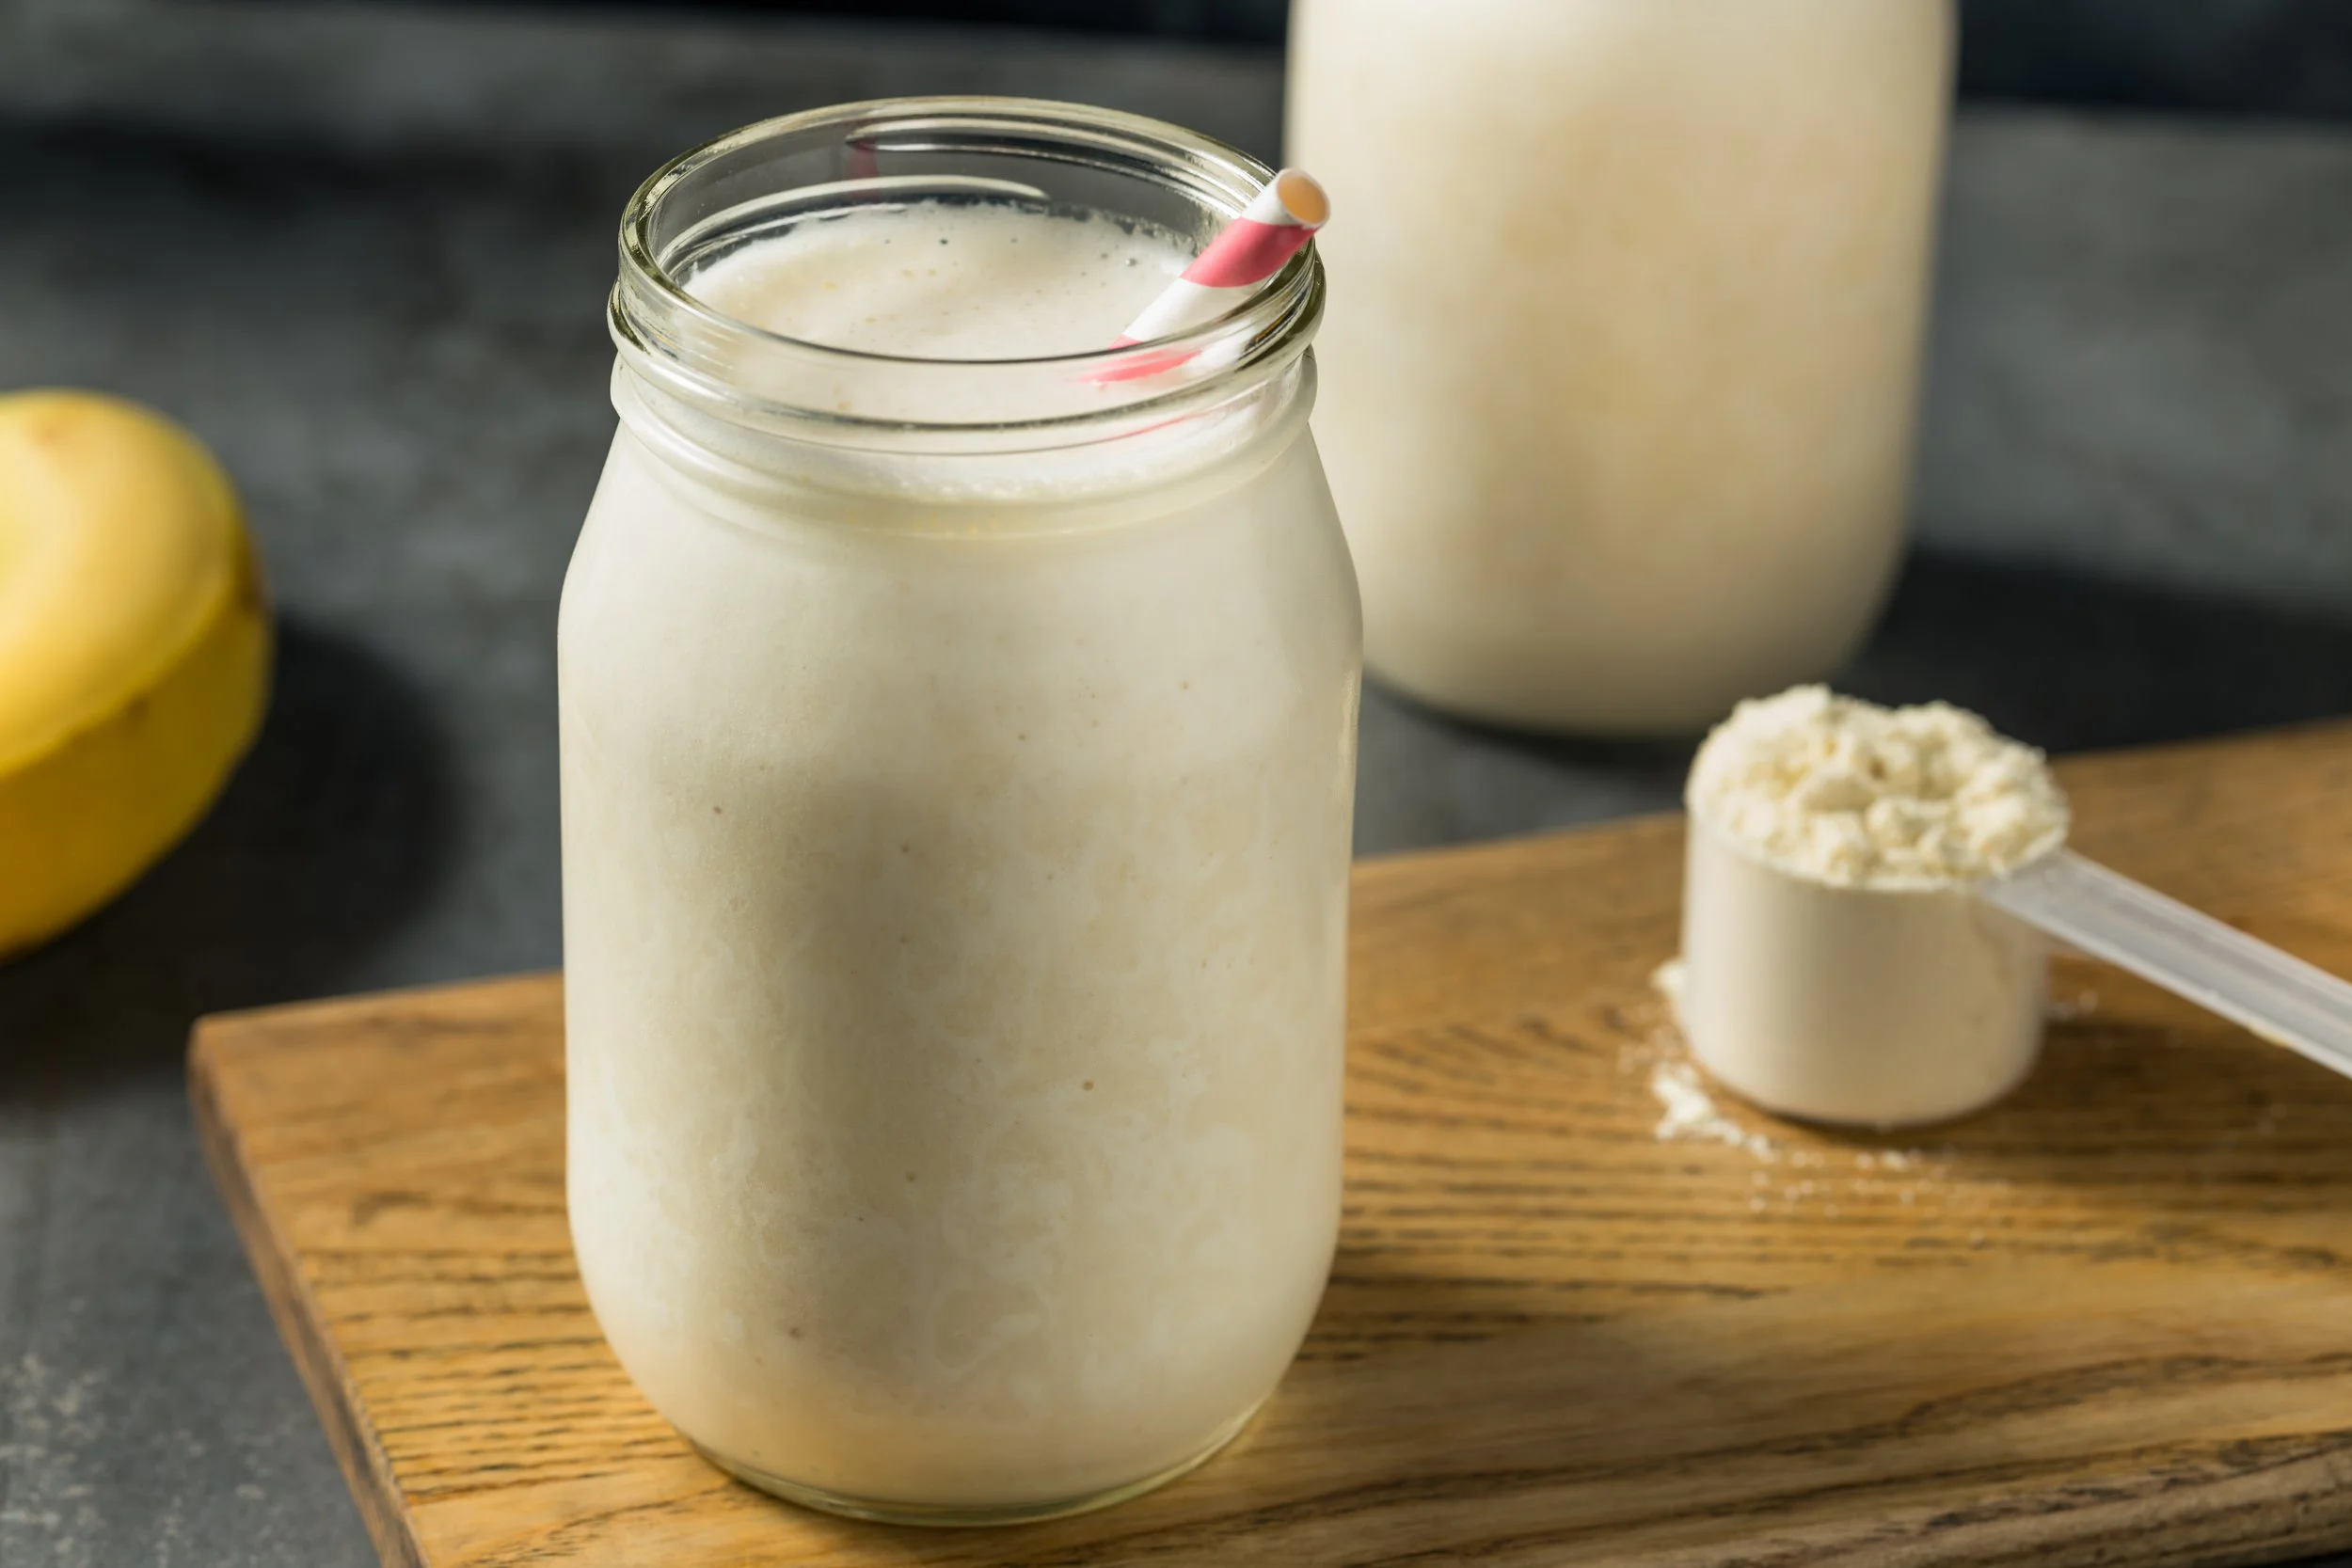
🍫💪 Chocolate Collagen Milkshake Magic: 4 Dreamy, Metabolism-Supporting Flavors
🔥 Blood sugar–steadying, metabolism-loving, and ridiculously good.
Rich, creamy, low-fat, and packed with protein + carbs—these collagen milkshake-style blends are designed to support your thyroid, stabilize blood sugar, and give you a satisfying treat without crashing your energy or hormones.
Each one starts with a pro-metabolic base:
🥛 Skim or low-fat milk for calcium, carbs, and sleep support
💪 Collagen for gut lining, joints, skin, and hair
🧁 Maple syrup or honey for glucose and glycogen replenishment
🍫 Optional cocoa or coffee for flavor and fuel
🧂 Salt + 🌿 vanilla to bring it all together
✨ Base Recipe:
🍫🥜 Cocoa Peanut Butter Cup Collagen Milk
A nostalgic milkshake flavor—with metabolic benefits.
Sweet, creamy, and decadent without the junk or seed oils. Peanut powder adds protein and flavor with virtually no fat, making this a perfect mini-meal.
Ingredients:
1 cup skim raw milk (or low-fat raw milk or milk of choice)
2 tbsp collagen
1 tbsp peanut powder (Organic PB2 or equivalent)
1 tsp cocoa powder
1 tbsp maple syrup
1/4 tsp vanilla extract
Dash of sea salt
Directions: Blend until smooth. Serve over ice or gently warmed. Enjoy mid-morning or afternoon.
☕ Variation #1: Mocha Peanut Butter Cup
Chocolate + coffee + peanut butter? Yes, please.
Add 1/2 - 1 cup strong brewed coffee or 1–2 shots of espresso
Keep all other ingredients the same
This variation makes a fantastic pre-workout or productivity booster.
☕️🍫 Variation #2: Classic Mocha Collagen Milk
No peanut, just chocolate and coffee.
Omit the peanut powder
Add 1/4–1/2 cup brewed coffee or espresso
Keep the cocoa, collagen, and sweetener
Think clean Starbucks mocha without the dairy, PUFA, or sugar crash.
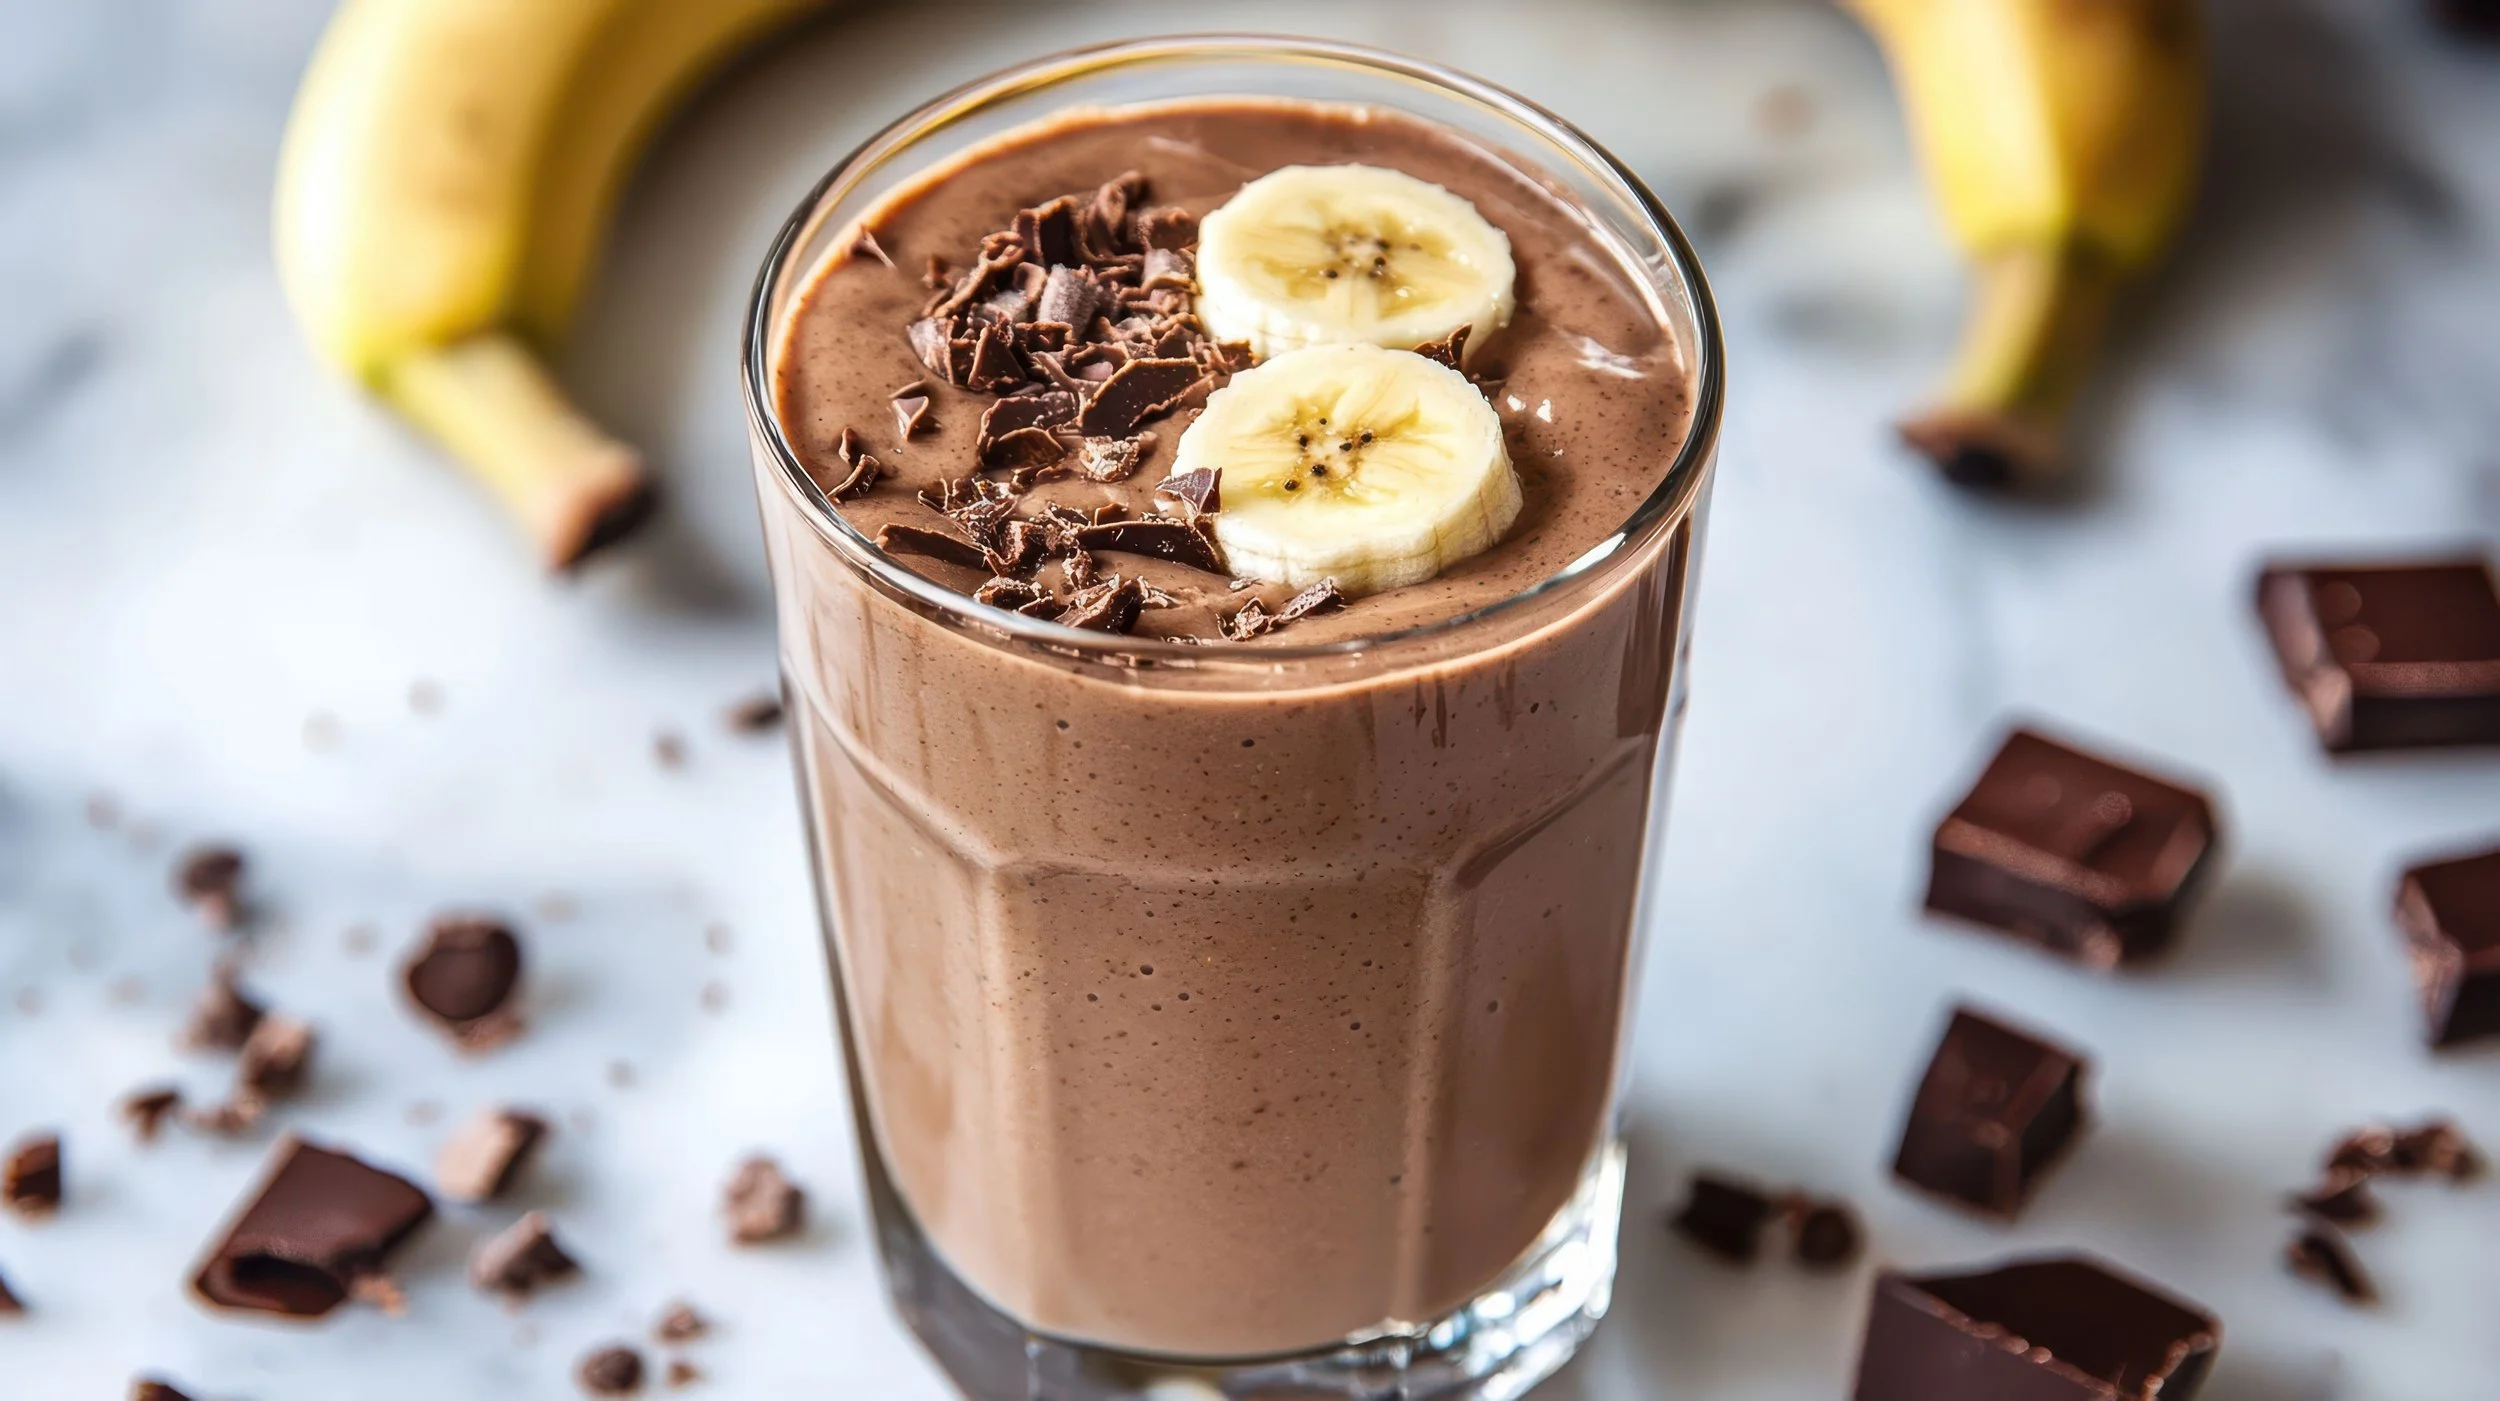
🍌 Variation #3: Chunky Monkey
Chocolate + banana = creamy, dreamy, potassium-packed.
Omit peanut powder
Add 1/2 of a ripe banana (fresh or frozen)
Keep cocoa, collagen, and maple syrup
Optional: Add cinnamon or a dash of nutmeg for extra warmth.
🍯 Variation #4: Salted Caramel Collagen Milk
Buttery-sweet flavor with none of the junk.
This one hits all the comfort buttons—sweet, salty, cozy—with a dreamy caramel vibe that feels like dessert. Bonus: it’s still low-fat, PUFA-free, and packed with collagen + calcium.
Omit:
Peanut powder
Cocoa powder
Add:
1–2 drops caramel extract OR swap the maple syrup for 1 tablespoon of real caramel sauce made with cane sugar and no seed oils, I like this one.
Keep or slightly increase the sea salt to enhance the caramel flavor
Optional: a pinch of cinnamon for warmth
Optional: Add a pinch of cinnamon for a warm, toasted note.
💖 Bonus Flavor Ideas:
Perfect for seasonal swaps or rotating new options into your mini-meal lineup:
🍓 Strawberry Cream: 1/2 cup strawberries + honey + vanilla
🍥 Coconut Caramel: Add a dash of coconut extract + maple
🎂 Birthday Cake: Use butter + almond extract + vanilla
🍎 Apple Pie: Add applesauce + cinnamon + honey
🍑 Peaches & Cream: Use ripe peach + vanilla + maple syrup

🥤Metabolic Milkshakes: Sipable Mini Meals for Energy + Hormones

Metabolic Mini Meal Sipper (Master Recipe + Flavor Variations)
A low-fat, high-carb protein + carb drink to support blood sugar, thyroid, and muscle during fat loss or healing. Blend or shake and sip every 2–3 hours.
🔧Master Formula
1 cup liquid (skim milk, fruit juice, carrot juice, or lemonade)
2 tbsp collagen or gelatin
1/2 cup protein source (nonfat Greek yogurt or lowfat cottage cheese)
1 tbsp natural sweetener (maple syrup, honey, or stewed fruit)
Flavor add-ons (spices, cocoa, fruit, citrus, vanilla, pinch of salt)
🧬 Macros: ~20–25g protein, 20–35g carbs, 0–2g fat
🍊 Orange Julius
6 oz orange juice
1/2 cup nonfat Greek yogurt
2 tbsp collagen
Splash vanilla + pinch of salt
🍁 Maple Milk
1 cup skim milk
2 tbsp collagen
1 tbsp maple syrup
Dash of vanilla + pinch of salt
☕ Mocha Latte
1 cup strong coffee or 2 shots espresso
1 cup skim milk
2 tbsp collagen
1 tsp cocoa powder + 1 tbsp maple syrup
🍫 Chocolate Peanut Butter
1 cup skim milk
2 tbsp collagen
1 tsp cocoa powder
1 tbsp peanut powder
1 tsp honey
🐒 Banana Cream
1/2 banana
1/2 cup nonfat Greek yogurt
1/2 cup skim milk
2 tbsp collagen
Dash cinnamon + pinch salt
🍑 Peaches & Cream
1/2 cup canned peaches (in juice, drained)
1/2 cup lowfat cottage cheese
1 tbsp maple syrup
Splash almond milk to thin + dash cinnamon
🍓 Strawberry Yogurt
1/2 cup nonfat Greek yogurt
1/4 cup strawberry lemonade
2 tbsp collagen
Splash coconut water to thin
🥕 Carrot Cake
1/2 cup carrot juice
1/2 cup skim milk
2 tbsp collagen
1 tbsp maple syrup
Dash cinnamon + pinch salt
🌴 Tropical Glow
1/2 cup pineapple juice
1/2 cup frozen mango
1/2 cup nonfat Greek yogurt
2 tbsp collagen
Squeeze lime + pinch salt
Whether you’re deep in a cut or just trying to keep your energy stable while healing, sipping your meals might just be the metabolic magic trick you were missing.
🌙 Bedtime Vanilla Maple Collagen Milk

🧋Sweet Sleep in a Cup
A mineral-rich, blood sugar–stabilizing nightcap to support deep, restful sleep.
If you're waking up at 2 a.m. or feeling wired at bedtime even though you're exhausted, it might be a blood sugar problem—not a willpower one. Your body needs fuel to stay calm and metabolically stable overnight. This bedtime milk delivers exactly that: fast-acting carbs to quiet cortisol, complete protein from collagen to support overnight repair, and a hefty dose of calcium to nudge melatonin production. It's sweet, simple, and deeply nourishing—no blood sugar crash, no middle-of-the-night wakeup. Just solid sleep.
🥛 Ingredients:
1 cup skim milk (rich in calcium and tryptophan)
2 tablespoons collagen powder
2 tablespoons maple syrup
Splash of pure vanilla extract
Dash of sea salt
🌀 Instructions:
Add all ingredients to a blender.
Blend on high for 20–30 seconds until smooth and frothy.
Pour into your favorite mug and sip warm or cold.
Optional: Gently heat on the stove after blending for an extra cozy feel—just don’t boil it.
💡 Why it works:
Calcium helps trigger melatonin release.
Maple syrup supplies a gentle glucose hit to keep blood sugar stable through the night.
Collagen provides glycine and protein to calm the nervous system and support tissue repair.
Skim milk keeps fat low while maximizing mineral and protein content—perfect for a metabolism-supportive cut or refeed.
🍂 Flavor Variations
1. 🥜 Peanut Butter Cup
Like drinking a peanut butter milkshake that puts you to sleep.
This version adds a hit of roasted peanut flavor that pairs perfectly with the vanilla and maple. Ideal for a little protein, carb, and calcium boost before bed—without the fat spike.
Add:
1 tablespoon peanut powder (like Organic PB2 or Just Great Stuff – no sugar added)
2. 🍁 Cinnamon Maple Dream
Add:
½ teaspoon ground cinnamon
Optional: pinch of nutmeg
Warm gently after blending for the ultimate bedtime hug in a mug.
3. 🍯 Honey Lavender
Replace maple syrup with:
1 tablespoon raw honey
Add:⅛ teaspoon food-grade dried lavender (or a drop of lavender extract)
Let the lavender steep in the warm milk after blending for 5 minutes, then strain. Incredibly relaxing for the nervous system.
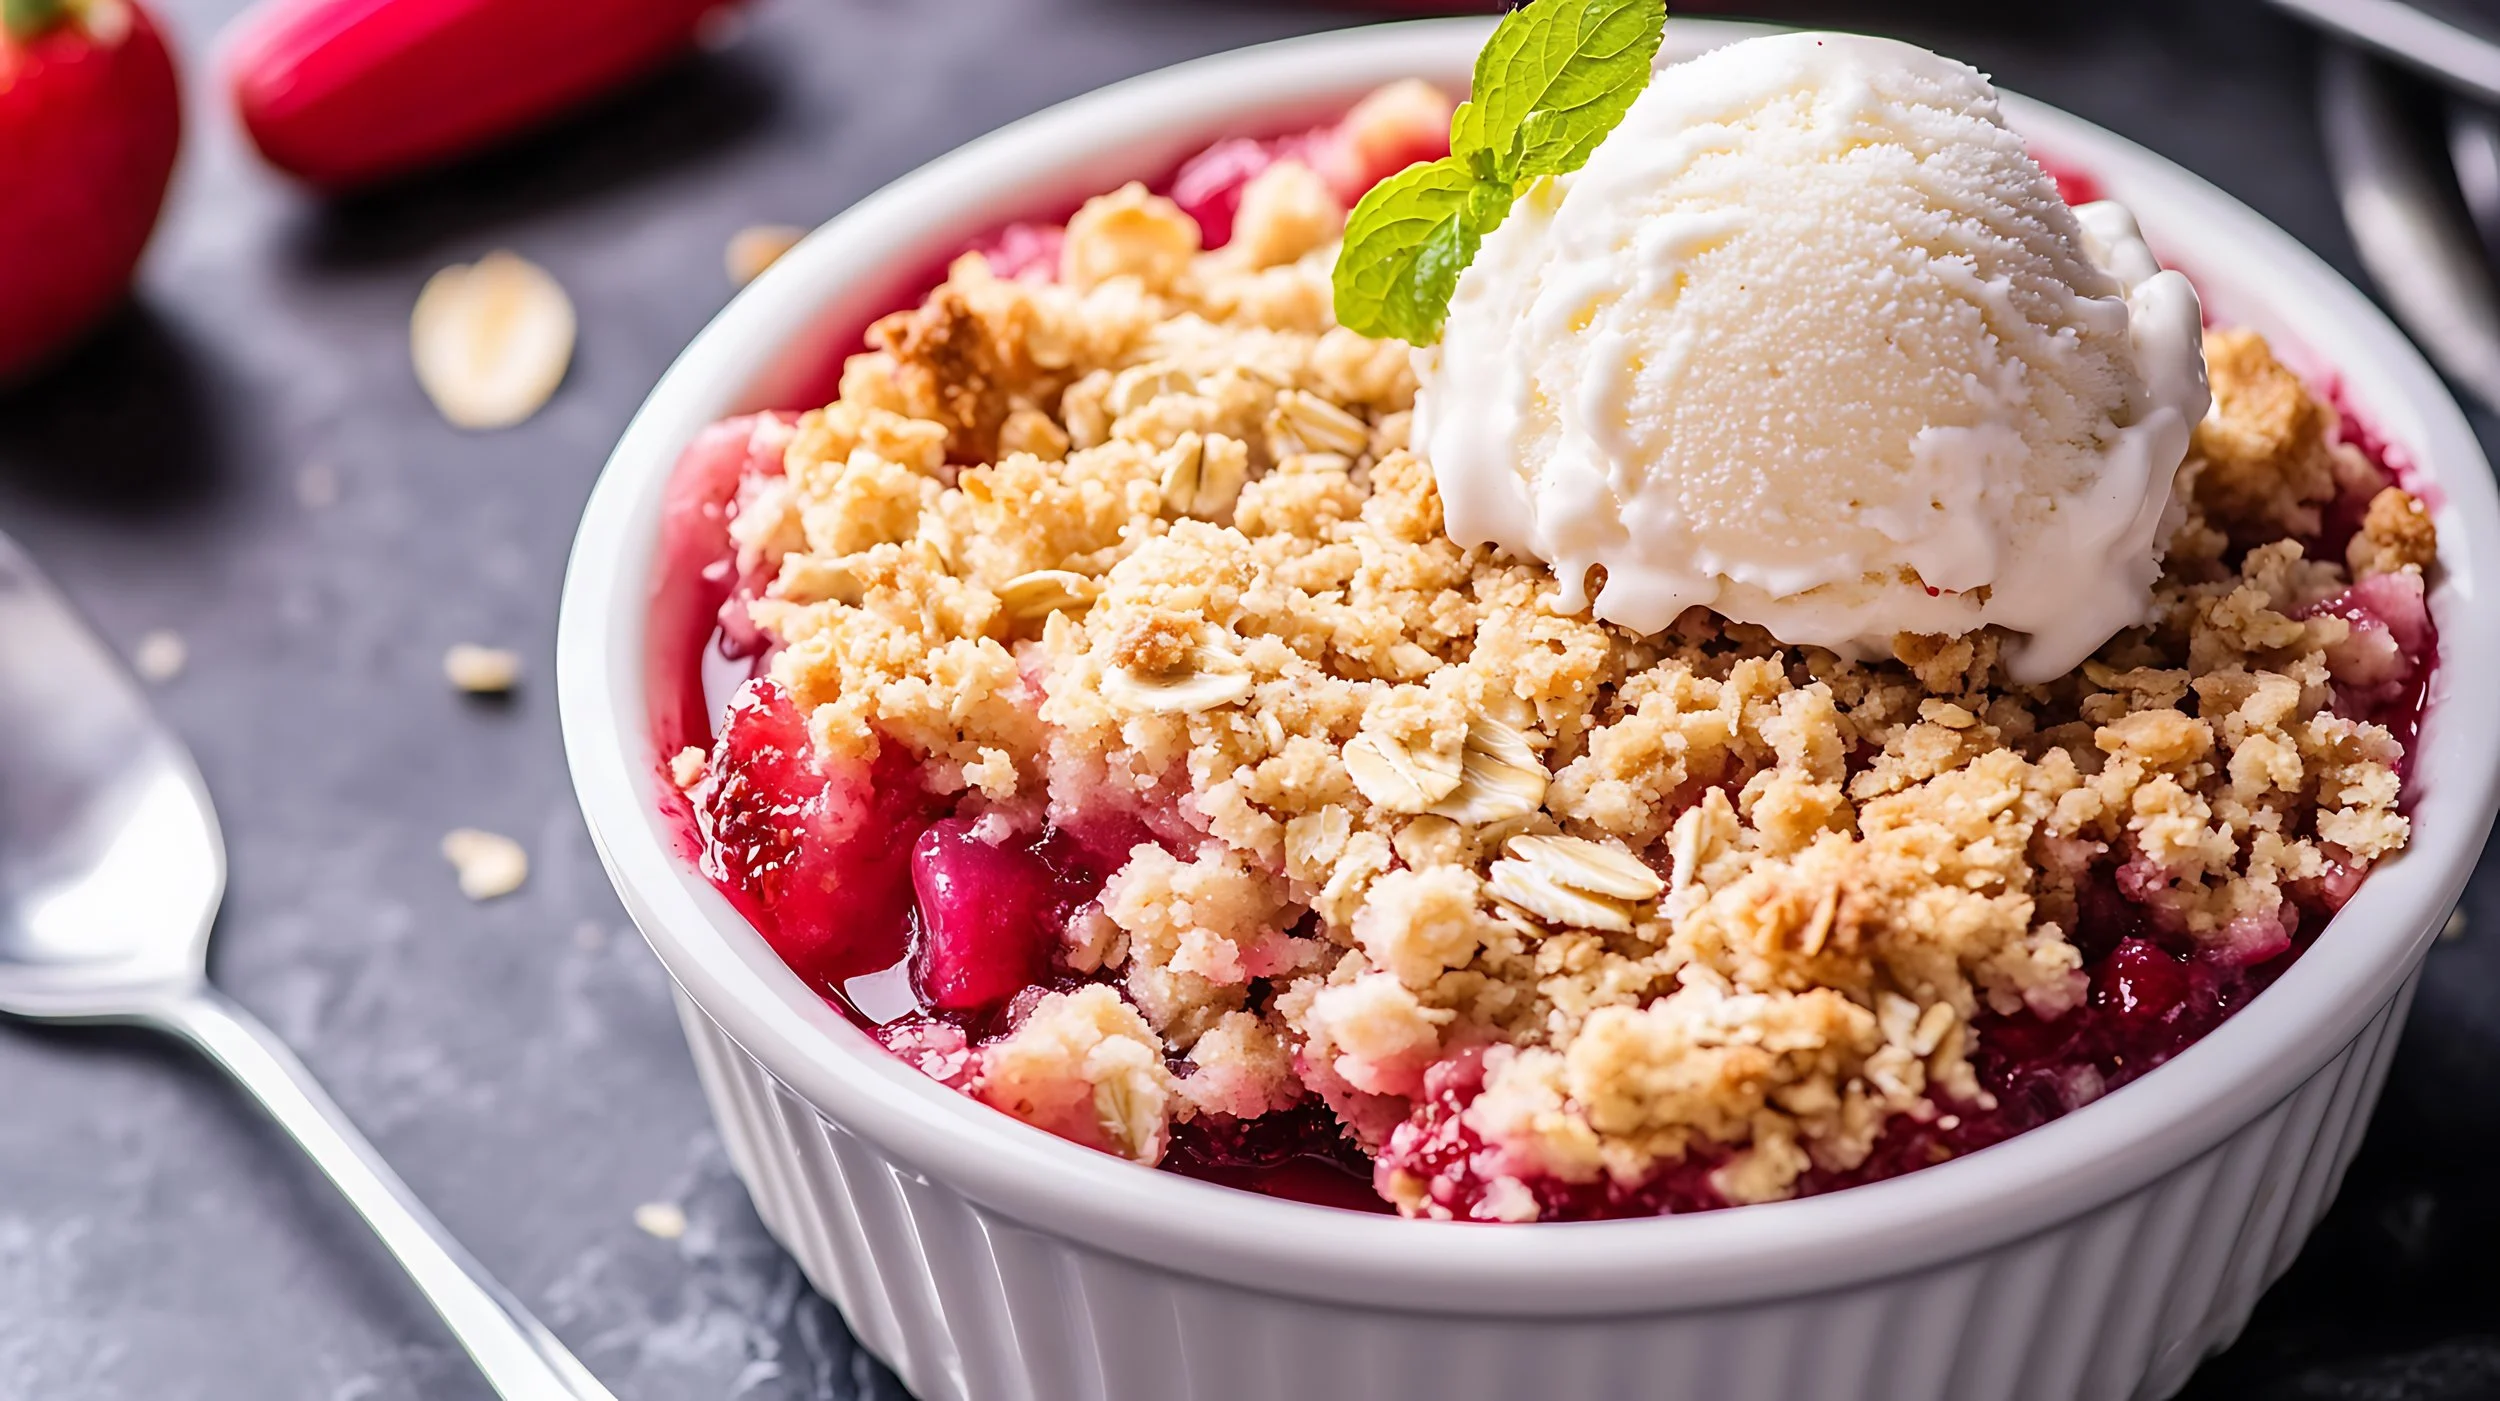
🍓 Gluten-Free Rhubarb Crisp

There’s something deeply nostalgic about a warm fruit crisp—especially when it’s tart, tangy rhubarb bubbling beneath a golden, buttery crumble. But most recipes are loaded with flour, sugar, and heavy fats that weigh you down instead of lifting you up. This version keeps it simple and light, using just a few nourishing ingredients: sprouted oats, rice flour, honey, and a touch of butter. It’s gluten-free, low-fat, and easy to digest—perfect for a spring or summer treat that won’t derail your metabolic goals. Whether you're deep in a refeed, easing out of a cut, or just craving something sweet without the junk, this crisp delivers comfort and function in every bite.
🌾 Ingredients:
Filling:
4 cups chopped rhubarb (fresh or frozen)
2–3 tbsp honey (adjust to sweetness preference)
1 tbsp rice flour (to thicken)
Optional: pinch of salt, ½ tsp vanilla, or a splash of orange juice for brightness
Topping:
¾ cup sprouted rolled oats
¼ cup rice flour
1–2 tbsp honey (depending on desired sweetness)
1–2 tbsp butter (keep it low-fat; can use 1 tbsp if needed)
Pinch of salt
🧑🍳 Instructions:
Preheat oven to 350°F (175°C).
In a bowl, toss the chopped rhubarb with honey and rice flour. Pour into a small 8x8 baking dish.
In another bowl, mix sprouted oats, rice flour, honey, and a small amount of melted butter. Use a fork to combine until crumbly.
Sprinkle the topping over the rhubarb.
Bake for 35–40 minutes, or until the topping is golden and the fruit is bubbly.
Let cool slightly before serving. Optional: serve with a spoonful of low-fat yogurt or skim milk on the side.
🍯 Macros (Per Serving, assuming 6 servings with 1 tbsp butter total):
Calories: ~140–160
Carbs: ~28g
Fat: ~3–4g
Protein: ~2g
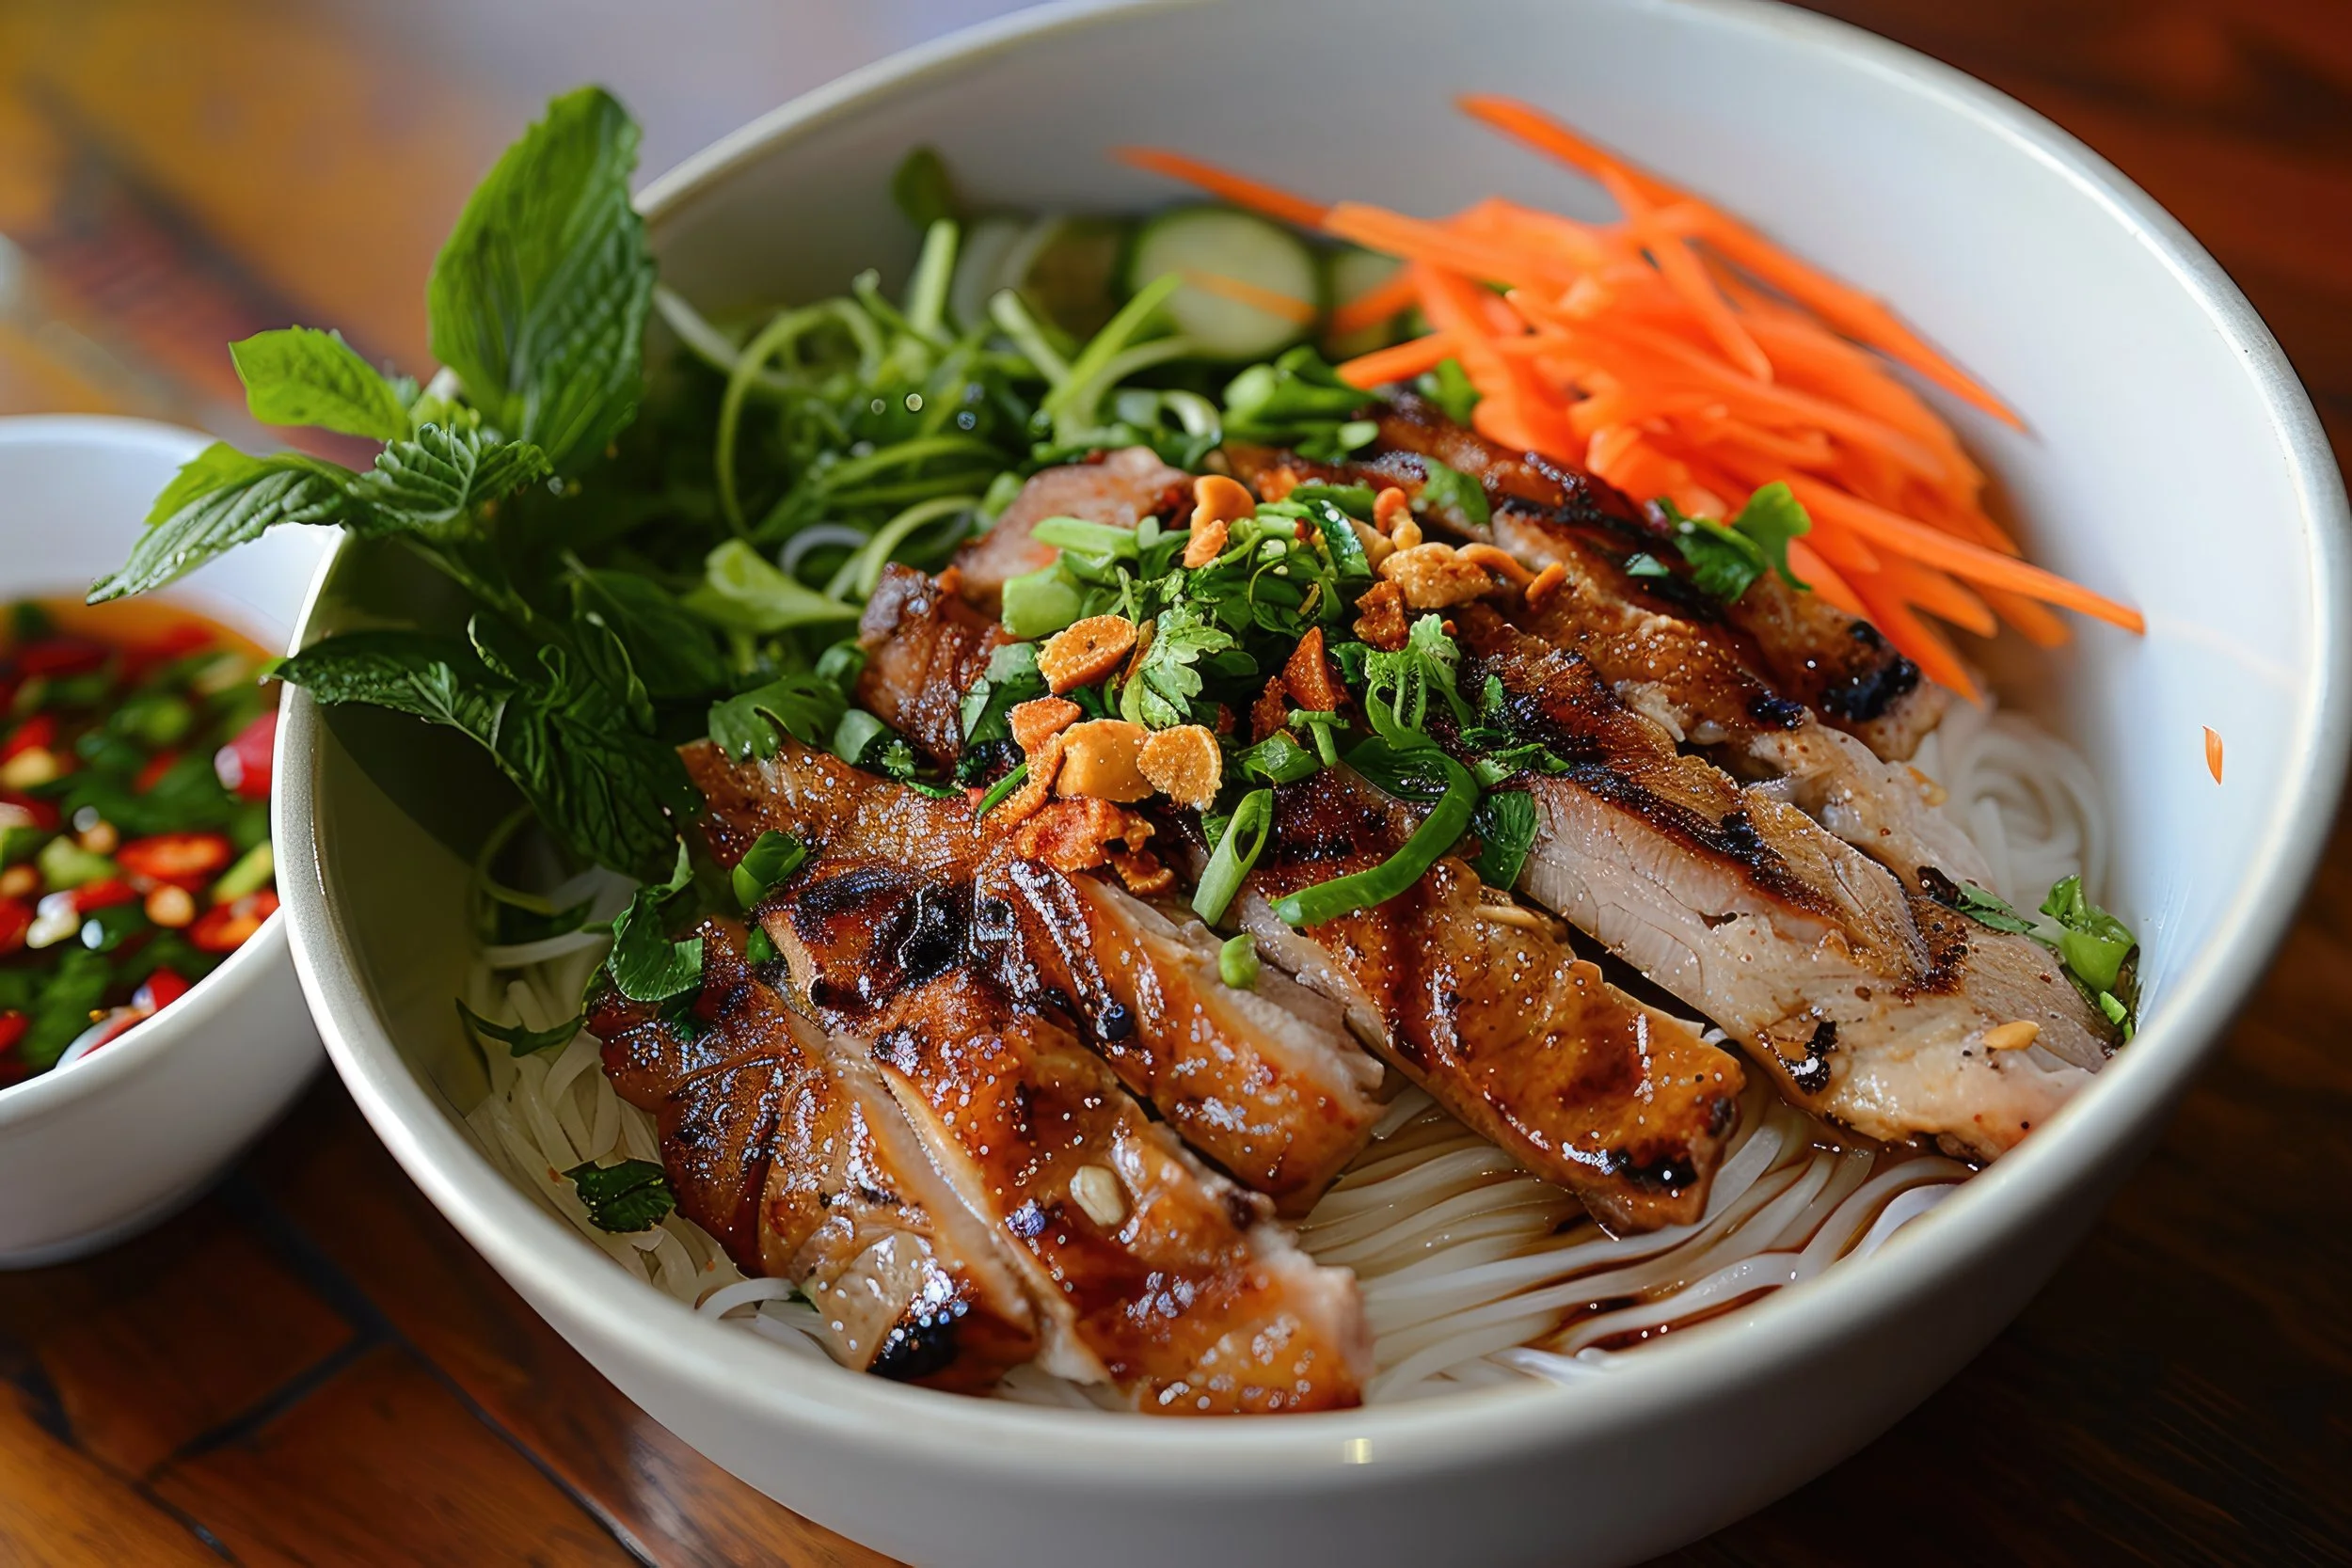
🥢 Vietnamese Vermicelli Salad with Grilled Chicken

Looking for a high-protein, low-fat meal that actually tastes like summer? This Vietnamese-inspired vermicelli bowl hits every note: cool rice noodles, crisp herbs, pickled veggies, and juicy grilled chicken — all brought to life with a tangy, umami-packed dipping sauce. Unlike restaurant versions that sneak in seed oils or deep-fried shallots, this version is clean, lean, and 100% pro-metabolic. It’s also endlessly customizable: bump the carbs for a refeed, or keep it tight for a cut. And yes — it’s still so satisfying.
📝 Ingredients (Serves 2)
🍜 Vermicelli Base:
3 oz dry rice vermicelli noodles (about 2 loosely packed cups cooked)
8 oz chicken breast, cut into thin strips or chunks
1 tsp coconut aminos/tamari and/or fish sauce (for chicken marinade)
2 cups shredded romaine or butter lettuce
½ cup fresh cucumber, thinly sliced
¼ cup shredded or julienned carrot
Fresh herbs — mint, cilantro, Thai basil
🥣 Nuoc Cham-Inspired Sauce (Low-Fat):
3 tbsp fresh lime juice
2 tbsp fish sauce
1 tbsp coconut sugar or maple syrup
1 small garlic clove, minced
1 tbsp water
Optional: pinch of chili flakes
🔧 Optional Garnish (Choose 1 if fat allows):
1 tbsp crushed peanuts (~4g fat)
1 tsp fried shallots (~1.5g fat)
1 tbsp pickled onion (fat-free, adds tang)
🔥 Directions
Cook vermicelli noodles according to package. Rinse under cold water and drain well.
Marinate chicken in coconut aminos/tamari and fish sauce. Grill or sear in a cast-iron pan until fully cooked (no oil needed on the grill, maybe a small amount of ghee spray on the cast-iron).
Assemble salad bowls with lettuce, herbs, cucumber, carrot, and noodles.
Top with chicken, garnish with herbs and optional toppings.
Whisk nuoc cham sauce ingredients together. Drizzle over each bowl just before eating.
📊 Macros (Per Serving without garnish):
Calories: ~350
Protein: ~30g
Carbs: ~40g
Fat: ~4g
(Add ~4g fat per tbsp of peanuts or garnish as needed.)
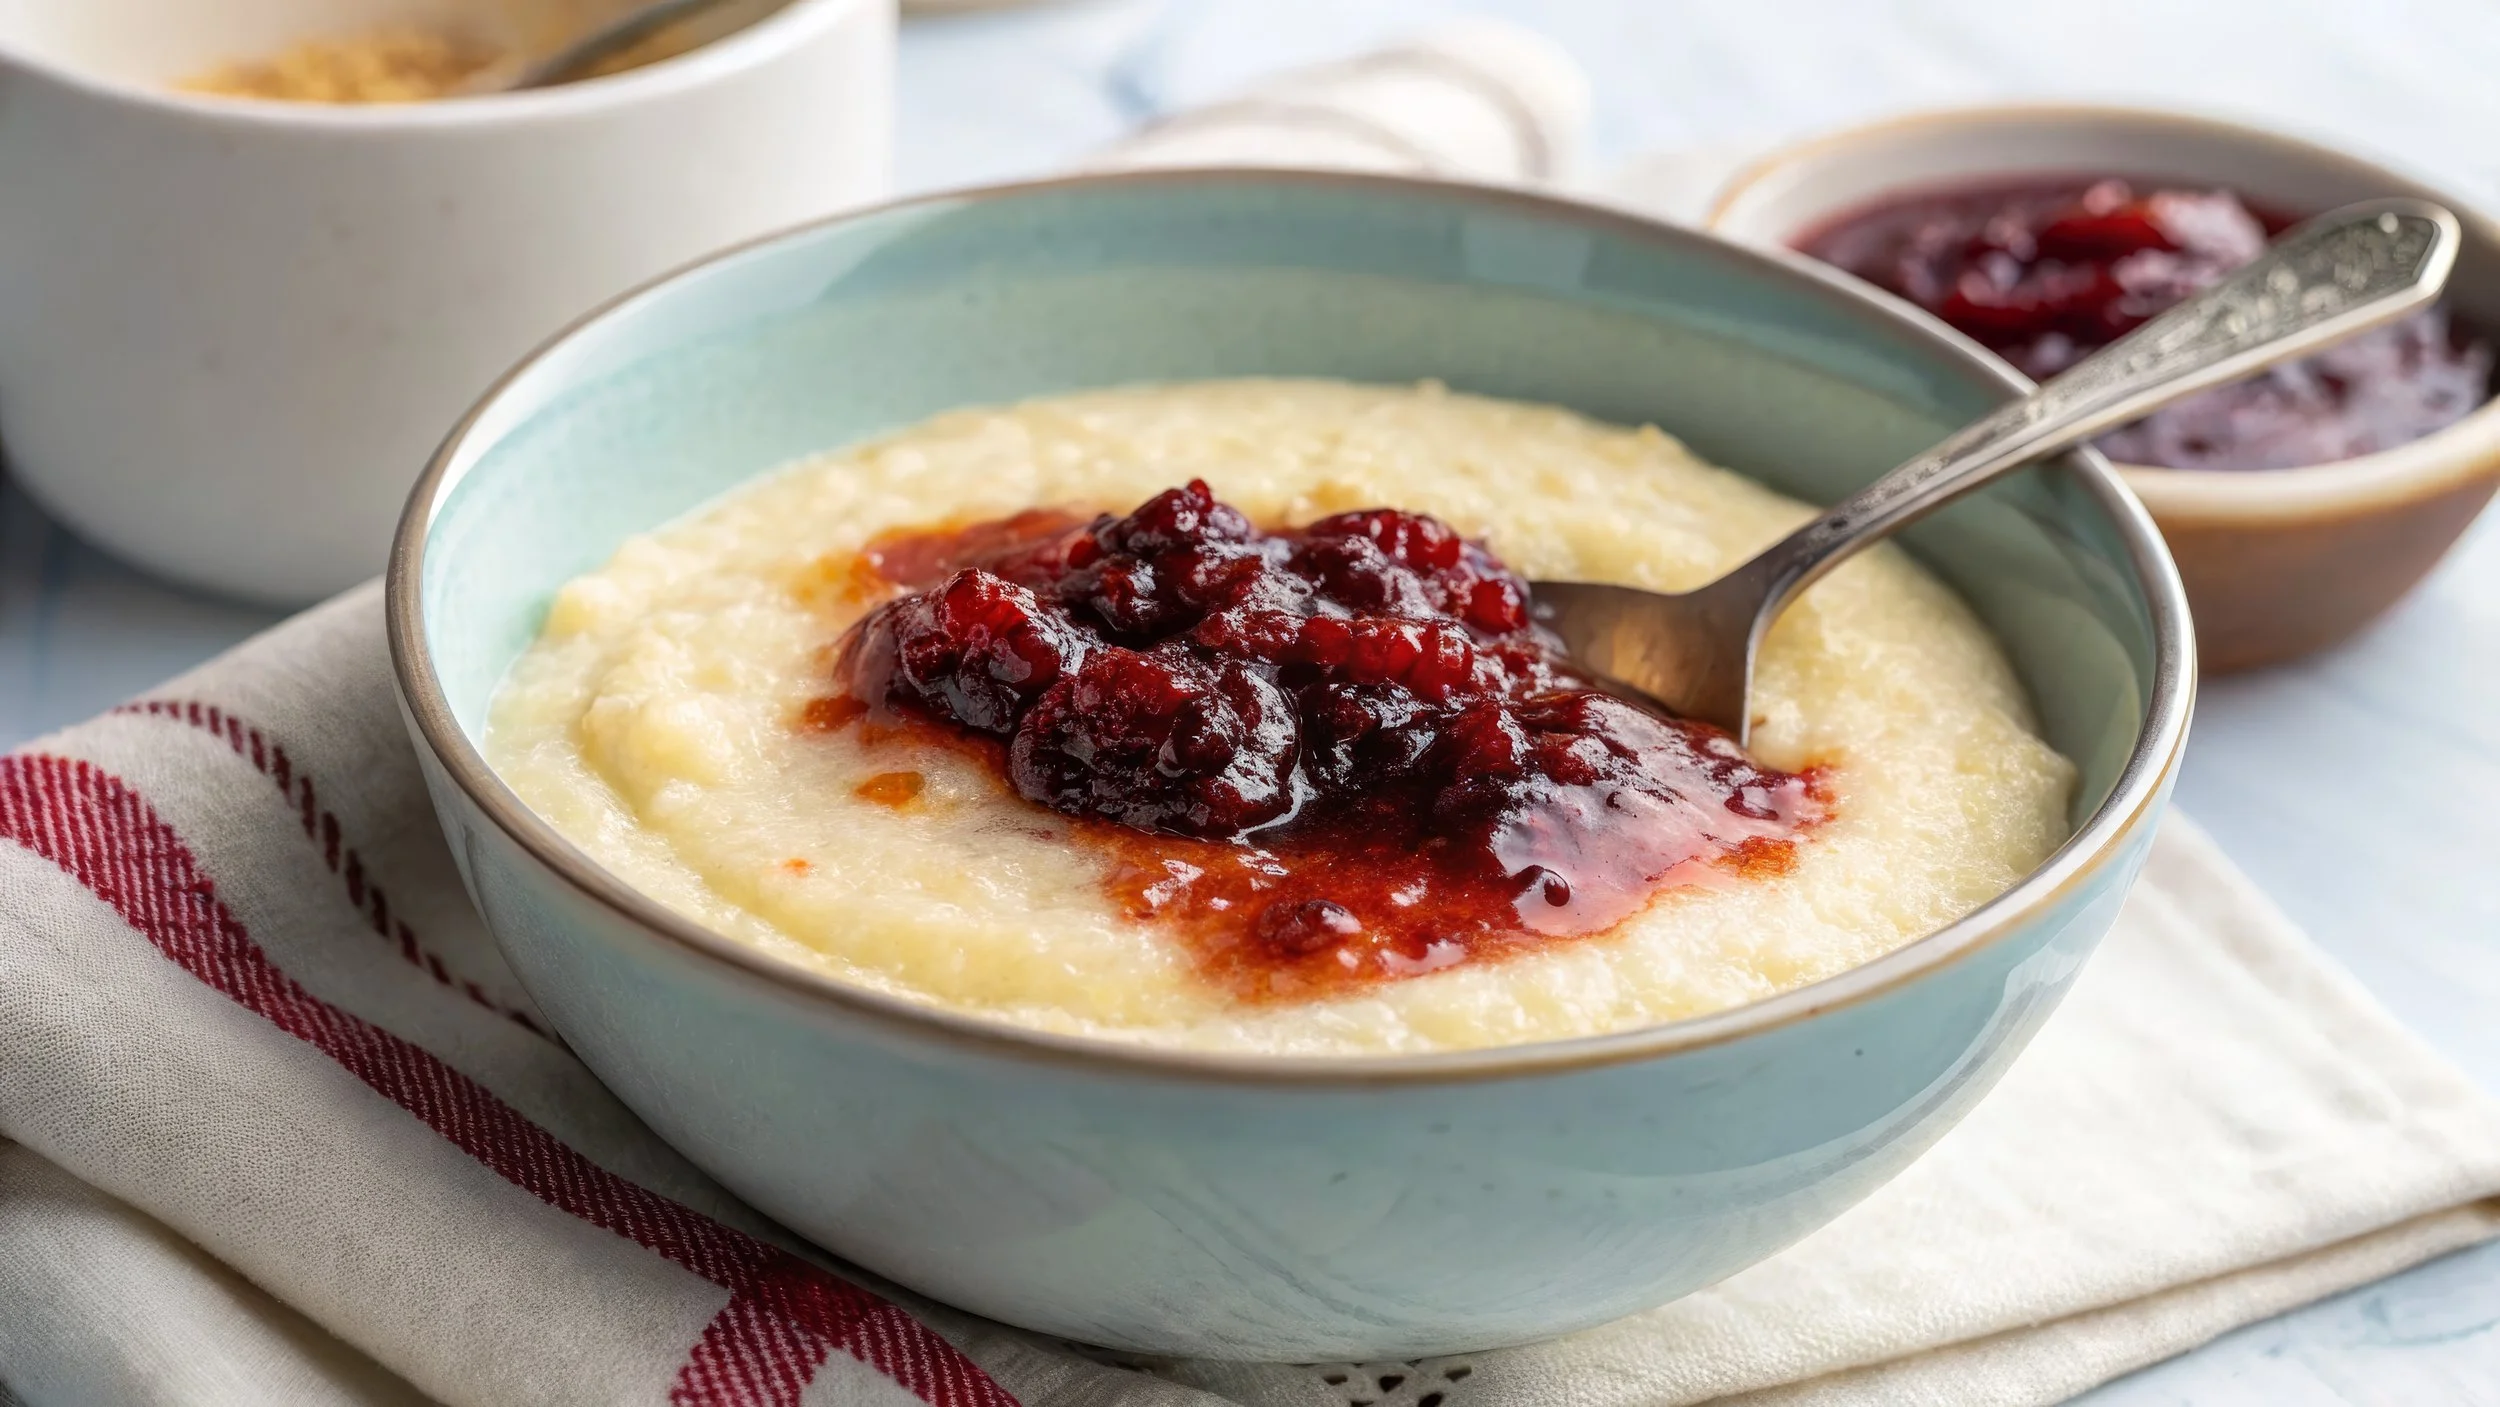
🥣 Creamy Masa Porridge (Masa Harina)

Looking for a warm, comforting breakfast that’s gentle on the gut and fuels your metabolism? This creamy masa porridge is a modern spin on a Dominican classic—made with skim milk, brown sugar, and aromatic cinnamon, it's naturally gluten-free, easy to digest, and endlessly customizable. Think of it as your cozy, carb-loving answer to oatmeal—but smoother, simpler, and just as nostalgic.
Yields: 4 servings (~1½ cups each)
Time: Prep 5 min • Cook 8–10 min
Ingredients
1 cup masa harina (nixtamilized corn flour, like King Arthur)
6 cups skim milk
1 cup brown sugar OR 2/3 cup honey
½ tsp salt
2–3 whole cinnamon sticks or 1 teaspoon ground ceylon cinnamon
1 Tbsp vanilla extract
Optional: pinch of nutmeg, maple syrup, honey, or a pat of butter for serving
Instructions
Mix It Up
In a medium pot, whisk together masa harina, skim milk, brown sugar, salt, cinnamon sticks, and vanilla extract. Let sit for 5–10 minutes to hydrate the masa.Cook It Slowly
Turn heat to medium and stir continuously until it begins to bubble. As it thickens, reduce heat to low and keep whisking for 4–5 minutes until smooth and creamy. Add more milk if it gets too thick.Serve & Enjoy
Remove cinnamon sticks. Ladle into bowls and top with optional maple syrup drizzle, butter, or a sprinkle of nutmeg.
Flavor & Topping Ideas
Stir in a spoonful of collagen or gelatin for extra protein.
Add a splash of maple extract or orange juice for fun.
Top with fresh berries, jam, caramelized bananas, or a dusting of cinnamon.
Serve with a side of fruit juice or a latte for a full pro-metabolic breakfast.

🌾 Sprouted Oatmeal (Soaked + Simmered)

Sprouted oats can be a gentle, nourishing way to reintroduce grains on a pro-metabolic protocol—especially when properly prepared. Unlike conventional oatmeal, this method respects digestion by neutralizing anti-nutrients through soaking and using sprouted grains, which are naturally lower in phytic acid. When paired with metabolically supportive ingredients like raw milk, honey, and a touch of saturated fat, this bowl becomes a warming, blood sugar–friendly option that’s easy on the gut and aligned with ancestral wisdom.
Serves: 1
Prep time: 5 minutes (+ overnight soak)
Cook time: 5–10 minutes
🛒 Ingredients
½ cup sprouted rolled oats (ideally organic)
½ cup filtered water or skim milk
1 tsp apple cider vinegar (or lemon juice)
Pinch of sea salt
Optional (add after cooking):
¼–½ cup milk (skim, low-fat, or raw)
1–2 tsp honey or maple syrup
1 pat butter (optional for those not on low-fat)
Dash of cinnamon or vanilla
Pinch of collagen powder (stir in gently)
Handful of berries, sliced banana, or stewed apple
🥣 Instructions
1. Night Before: Soak the Oats
In a glass jar or bowl, combine:
½ cup sprouted oats
½ cup water or skim milk
1 tsp apple cider vinegar
Stir, cover lightly, and let sit at room temp overnight (8–12 hours).
2. Morning: Drain & Rinse
Drain and rinse the oats with warm water to remove excess phytic acid and sour flavor.
3. Simmer
Add the soaked oats to a small saucepan with:
½ cup fresh water or milk (more if you prefer looser oats)
Pinch of sea salt
Bring to a simmer and cook gently for 5–10 minutes, stirring often, until soft.
4. Customize
Turn off the heat and stir in any desired additions:
Extra milk for creaminess
Honey or maple for sweetness
Cinnamon or vanilla for flavor
A small pat of butter for richness
Collagen or fruit for protein and carbs
🍽 Notes
Sprouted oats are gentler on digestion and higher in bioavailable nutrients than unsprouted.
The overnight soak with ACV helps further neutralize anti-nutrients like phytic acid.
Keep fat minimal if using this during a cut — skip the butter and use skim milk.
For higher-protein versions, stir in collagen or pair with a scoop of low-fat Greek yogurt on the side.

🥞 Masa Pancakes
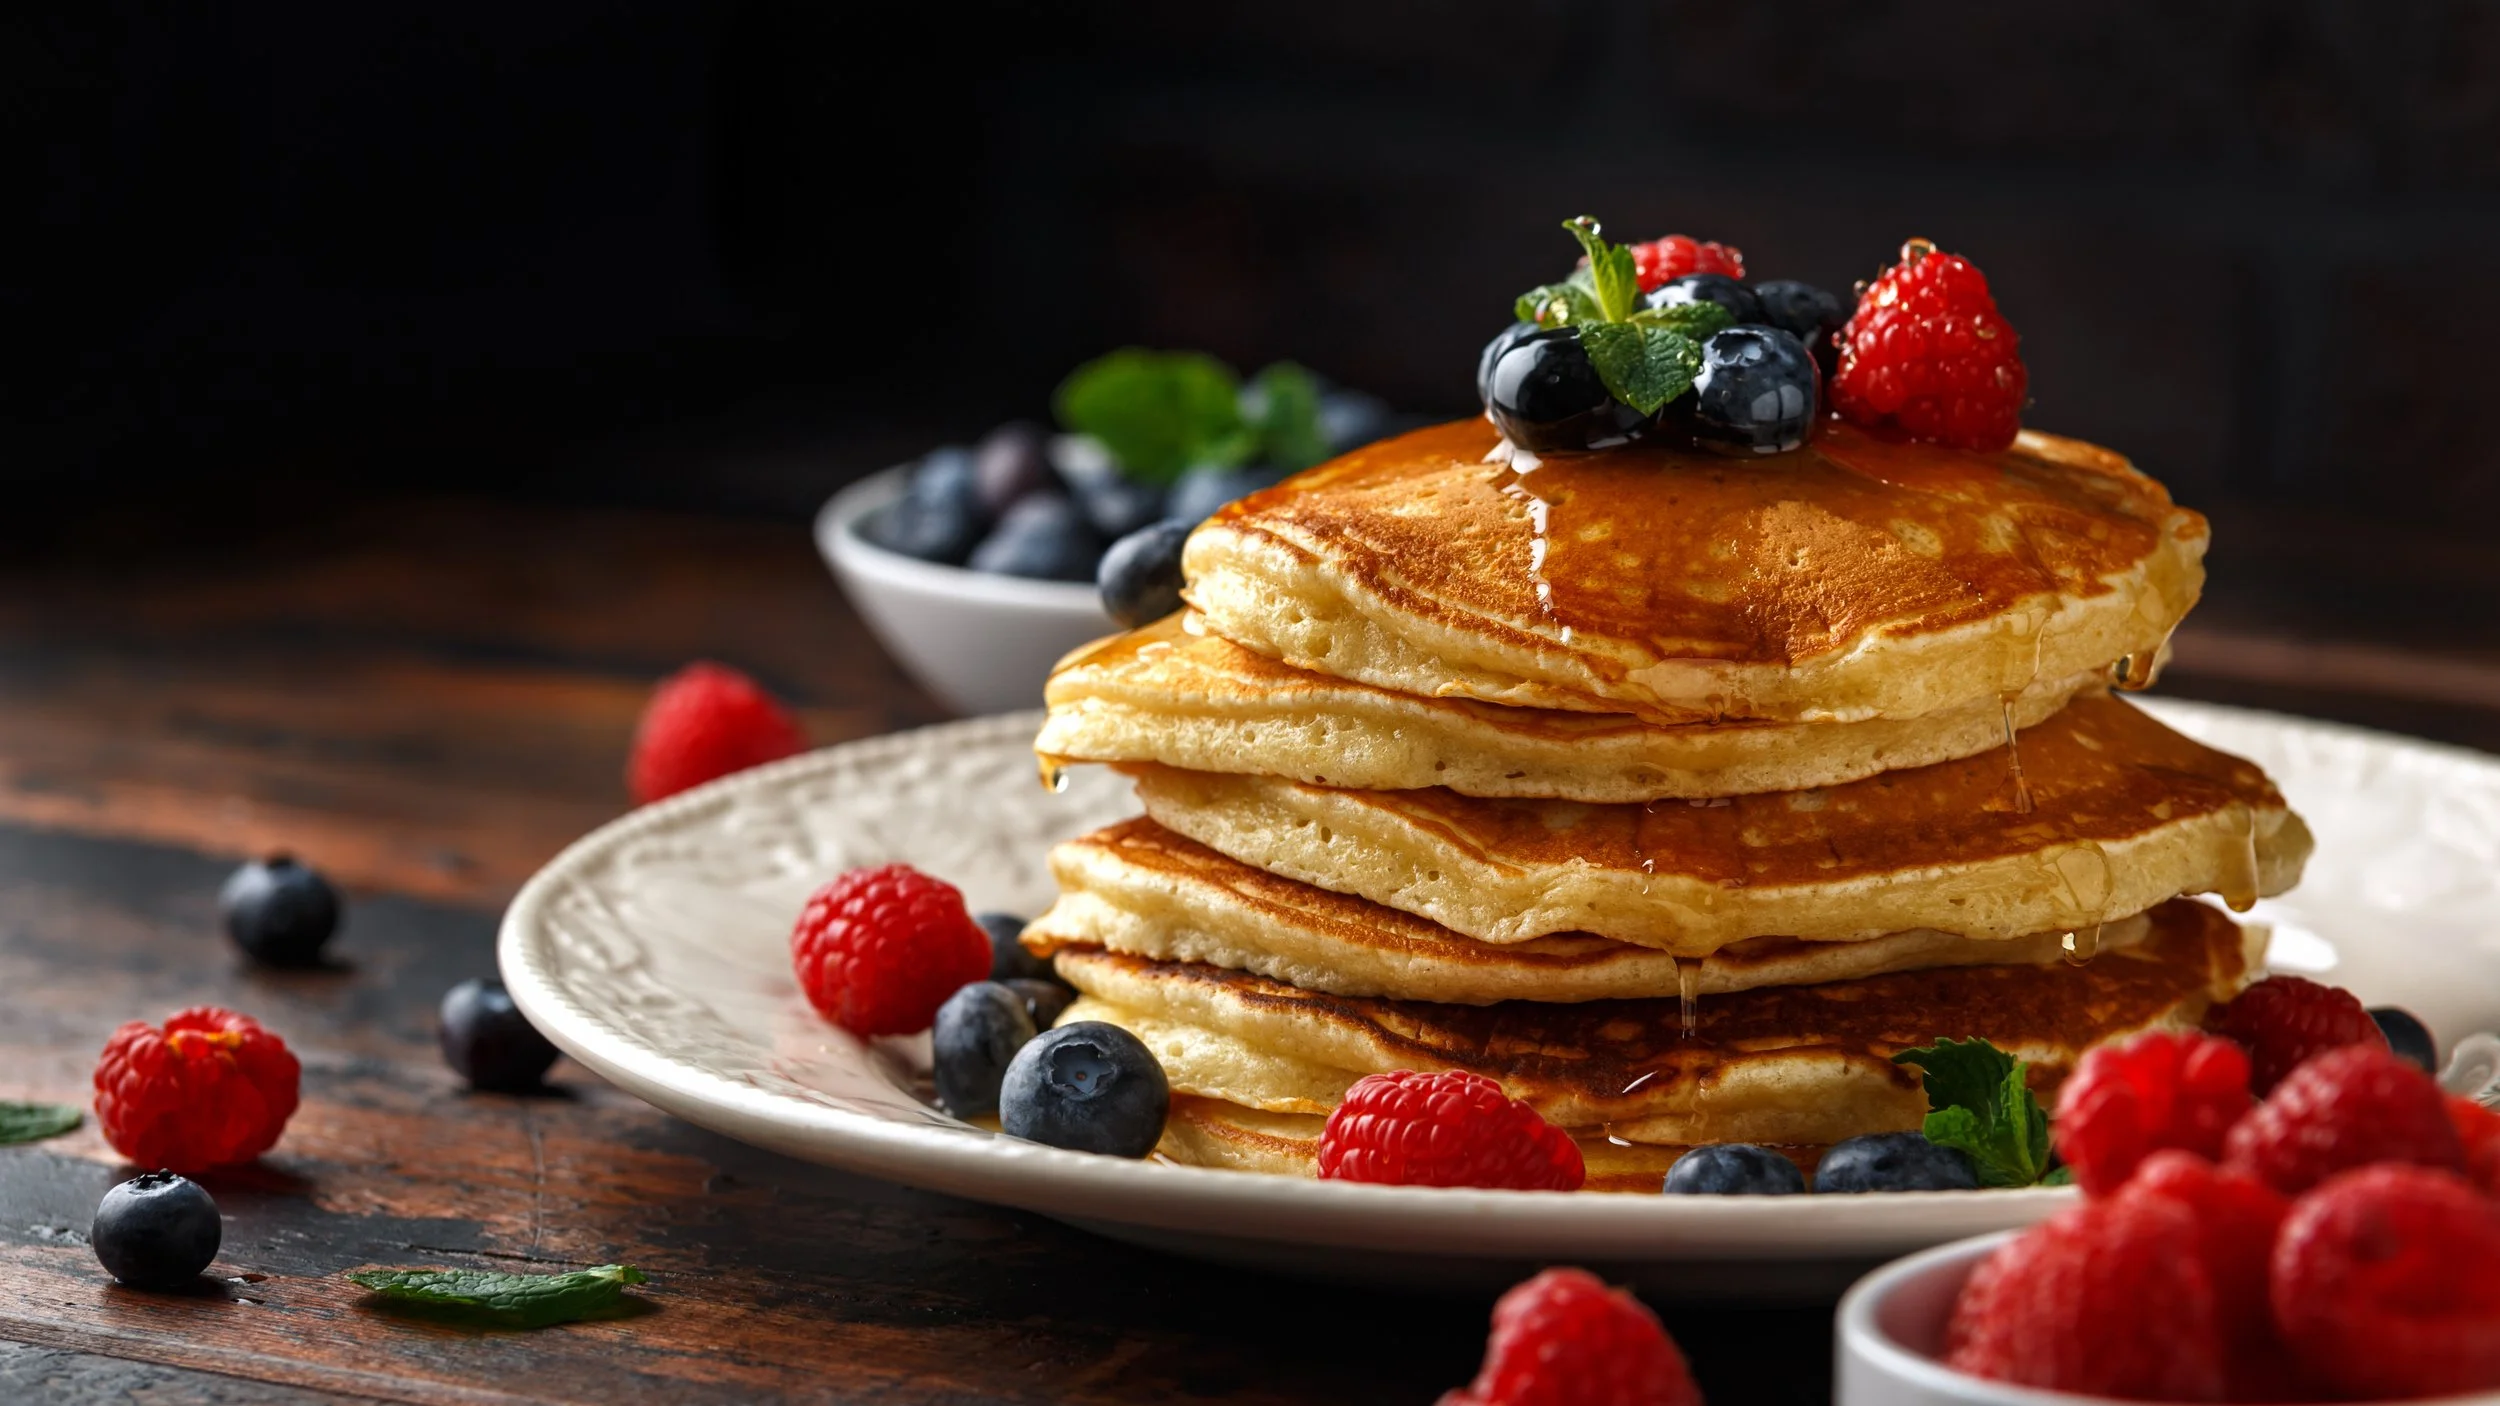
These are the ultimate metabolism-supporting pancakes—warm, fluffy, gut-friendly, and completely free of added fats. Perfect for anyone healing their liver, recovering from keto, or just looking for a high-carb, low-fat breakfast that doesn’t feel like diet food. Made with masa harina and sweetened with maple, they deliver the flavor and texture you want, without any butter or oil in the batter.
🌽. Masa harina is a traditional flour made from corn that has been nixtamalized—soaked and cooked in lime (calcium hydroxide)—which enhances its nutrient bioavailability, increases calcium content, reduces phytic acid, and makes it easier to digest, making it a gut-friendly, mineral-rich, and ancestral source of resistant starch and glucose.
🍽 Yields:
~14 pancakes (4-inch)
🌟 Ingredients
2½ cups low-fat buttermilk
(or 2¼ cups low-fat milk + 2 Tbsp lemon juice or ACV)1½ cups heirloom masa harina (nixtamalized, e.g., Masienda or King Arthur)
2 tsp aluminum-free baking powder
½ tsp kosher salt
1½ tsp ground Ceylon cinnamon
2 tsp vanilla extract
2 large eggs (or 4 egg whites for even lower fat)
¼ cup pure maple syrup
🔧 Directions
Make buttermilk (if needed):
Stir lemon juice into milk and let sit for 5–10 minutes.Mix dry ingredients:
In a bowl, whisk masa harina, baking powder, salt, and cinnamon until lump-free.Whisk wet ingredients:
In a large bowl, whisk eggs (or whites), maple syrup, vanilla, and buttermilk until smooth.Combine:
Stir the dry mix into the wet until just combined. Don’t overmix—batter will be thick but scoopable.Cook:
Heat a nonstick or ceramic skillet over medium. Lightly grease with a small amount of butter or oil (just enough to prevent sticking—this adds only trace fat). Scoop ¼ cup batter per pancake and spread into ~4-inch rounds. Cook ~2 minutes per side, until golden and cooked through.Serve with:
Warm maple syrup, stewed fruit, nonfat Greek yogurt, or a splash of OJ for the full pro-metabolic vibe.
🧮 Macros per Pancake (1 of 14):
(with 2 eggs, no added fat in batter)
Calories: ~78 kcal
Carbs: ~13g
Protein: ~2.5g
Fat: ~1g
If you use egg whites instead:
Fat drops to: ~0.3g per pancake
Calories drop slightly: ~73 kcal
✅ Notes & Tips
Still Fluffy: Even without fat, the pancakes stay tender thanks to the buttermilk and maple.
Pan Tips: A well-seasoned cast iron or ceramic nonstick pan is essential here.
Batch Prep: These freeze and reheat well, so make a double batch and pop them in the toaster all week.
These cinnamon-vanilla masa pancakes are gluten-free, low-fat, easy to digest, and sweetened naturally with maple. With no added fat in the batter, they’re the perfect high-carb breakfast for metabolic repair and hormone support — kid-approved and nutritionist-designed.
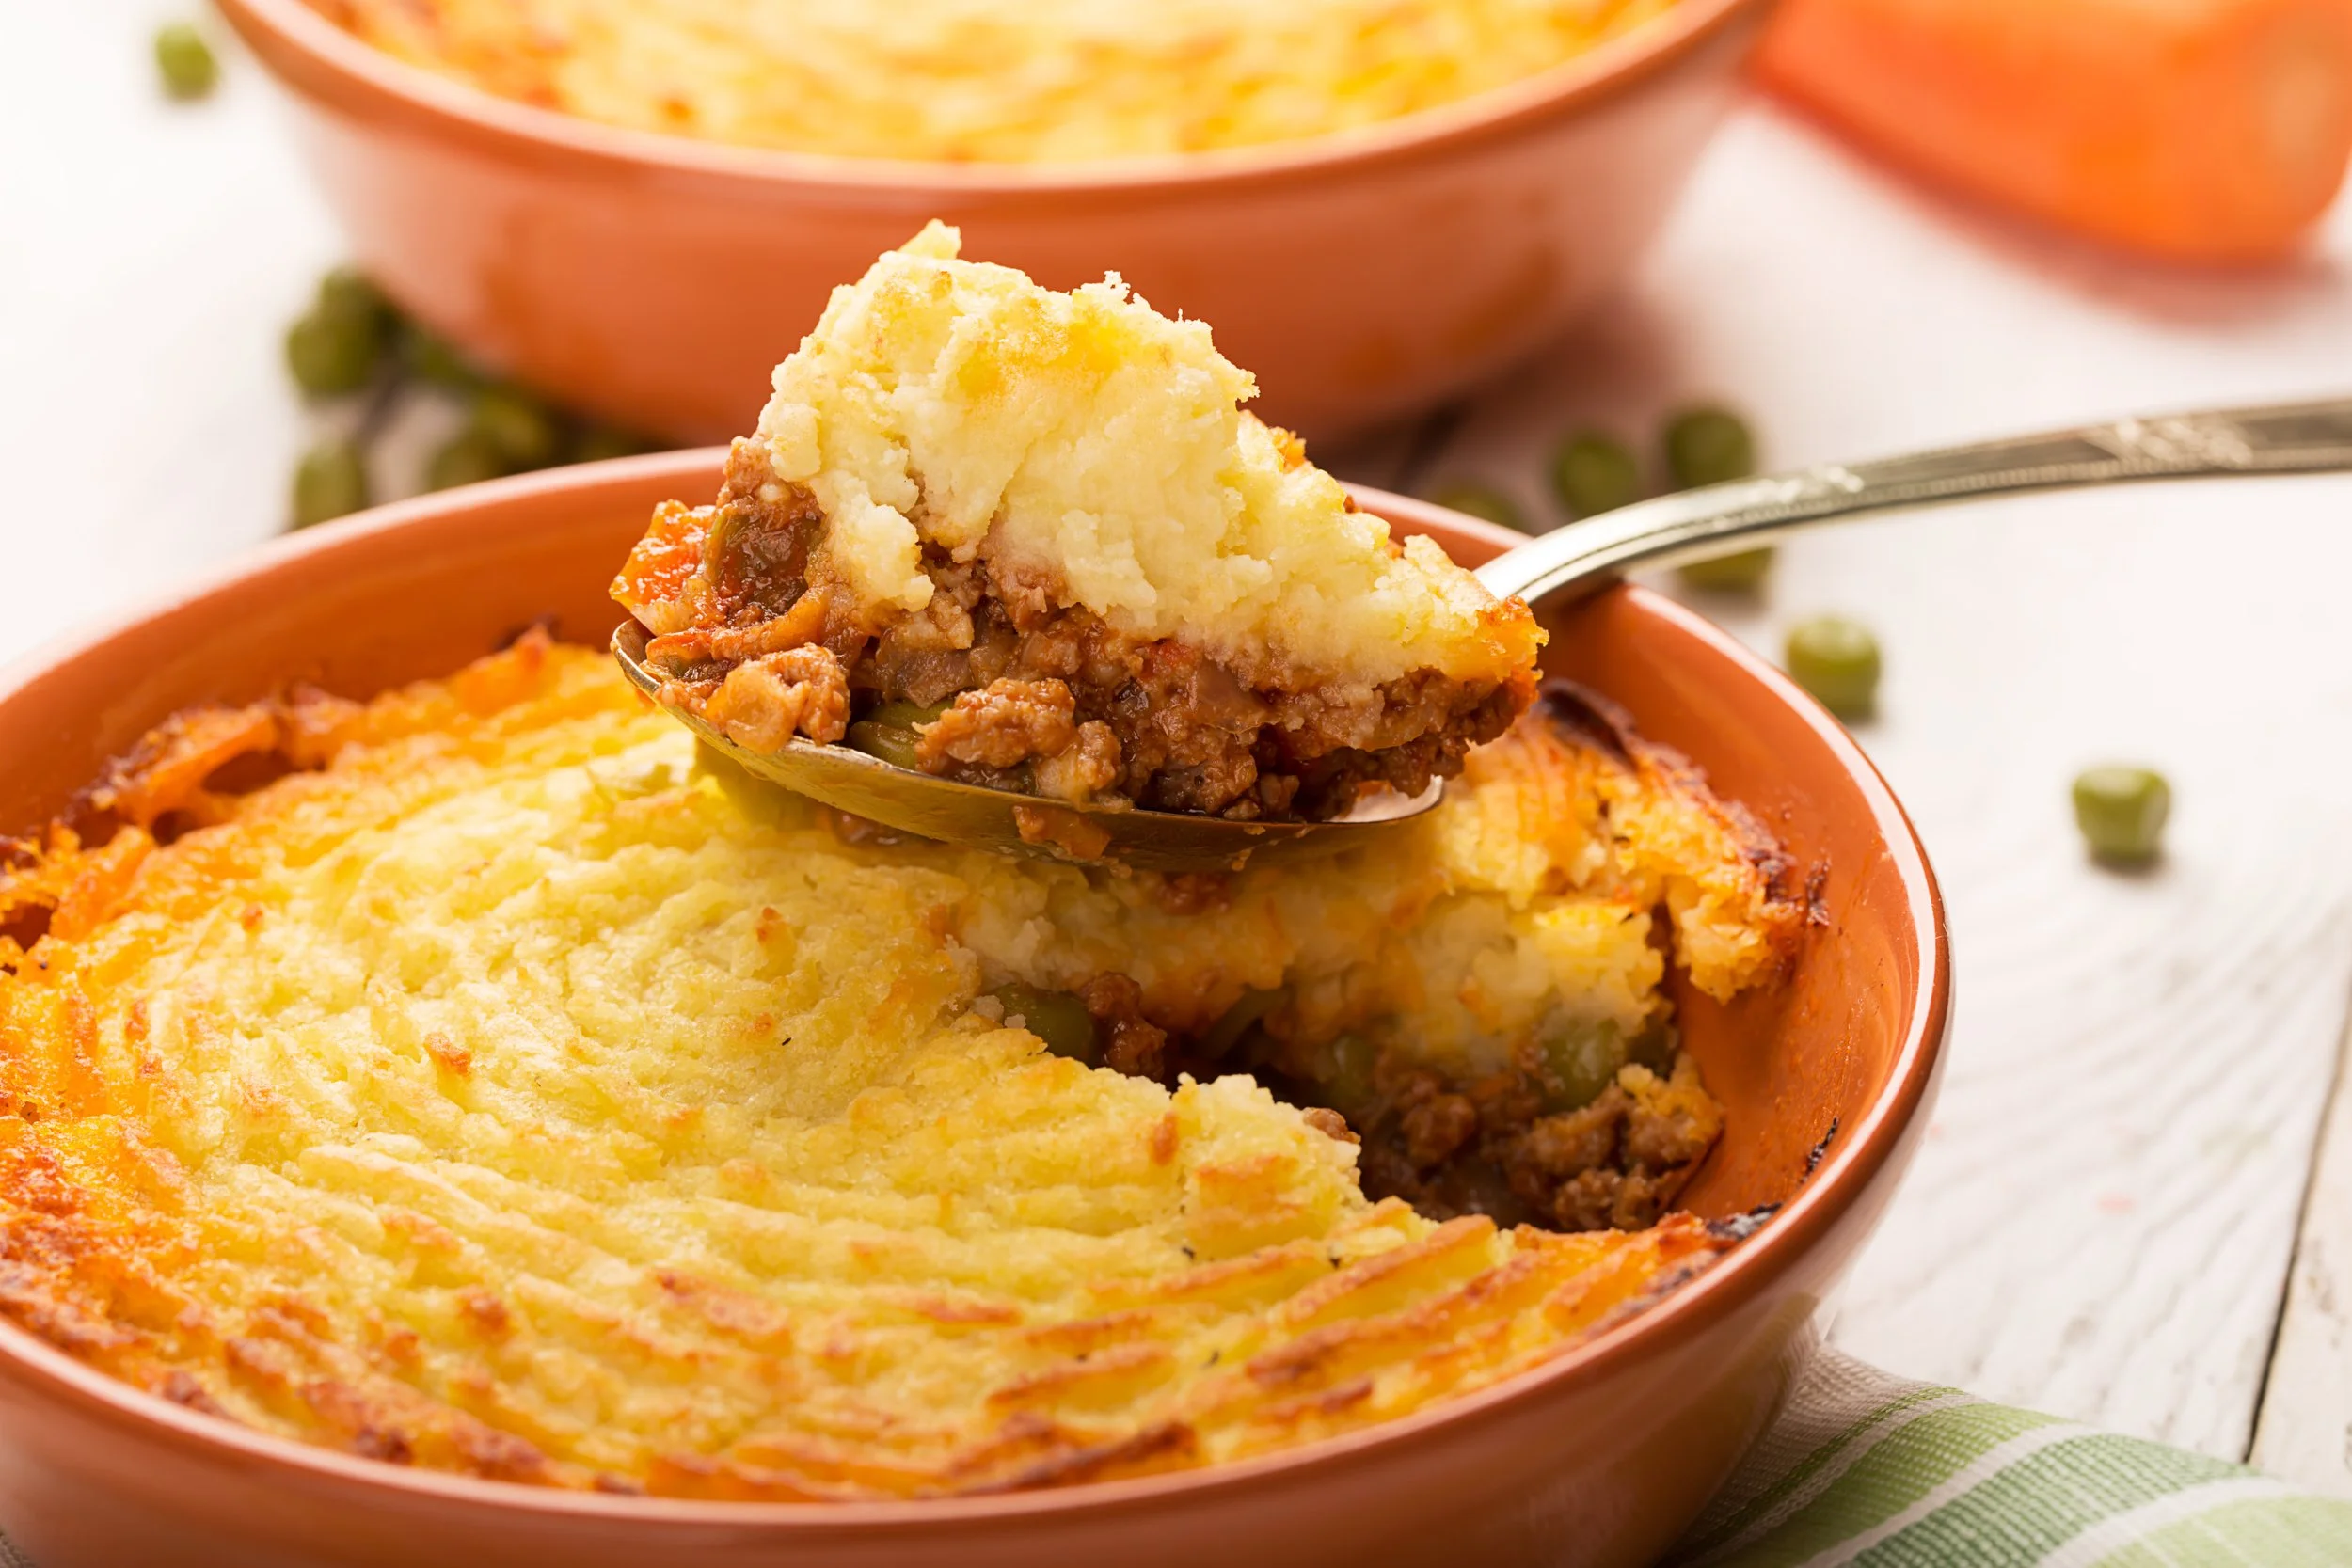
🍲 Shepherd’s Pie

It took me awhile to come around to the health benefits of the white potato, a true superfood! Our hunter-gatherer ancestors ate a lot of tubers - which are very low toxicity since they grow underground and don’t have to chemically deter animals from eating them as much as other plant parts. They’re also high in protein, vitamins and minerals - and cultures that ate a lot of them enjoyed robust health. Pair with ground beef, any other chopped vegetables of your choice like zucchini, carrots, summer squash, mushrooms, and even a little garlic, onion, and tomato paste if your body tolerates those! Be sure to make extra, even a double batch, as this freezes well and is sure to be a hit!
Ingredients
2 pounds lean ground beef, salted and browned
1 cup bone broth
1 zucchini, chopped
1 summer squash chopped
3 carrots, chopped
10 crimini mushrooms, rinsed and chopped
1 tablespoon potato starch
italian seasoning
sea salt
garlic, fresh or powder
onion, fresh or powder
Optional: 1 tablespoon tomato paste
Optional: 2 tablespoons worchestershire sauce
4 large potatoes, peeled and cut into large chunks
2 tablespoons butter
2/3 cup milk
1/2 cup parmesan cheese
Instructions
Preheat your oven to 400°F.
Bring a pot of water to a boil for the potatoes.
Boil potatoes until fork-tender, about 15 minutes.Brown the meat with the onions and garlic if using fresh.
If using powders, add them after browning the meat.Add broth, tomato paste, Worcestershire sauce (if using), Italian seasoning, and vegetables.
Cover and let steam for 5–10 minutes, or until carrots are tender.Scoop out ½ cup of the brothy sauce into a bowl.
Whisk in the potato starch to make a slurry (immersion blender works great).
Pour this slurry back into the pan and stir to create a gravy. Add more broth if needed.Strain the boiled potatoes and mash with milk, butter, and salt to taste.
Arrange the meat/vegetable/gravy mixture in the bottom of a baking dish or Dutch oven.
Spread the mashed potatoes on top of the filling.
Sprinkle with parmesan.
Bake uncovered for 20–30 minutes.
Optional: Broil for a few minutes at the end if the parmesan isn’t browned enough.Cool for about 10 minutes before serving.